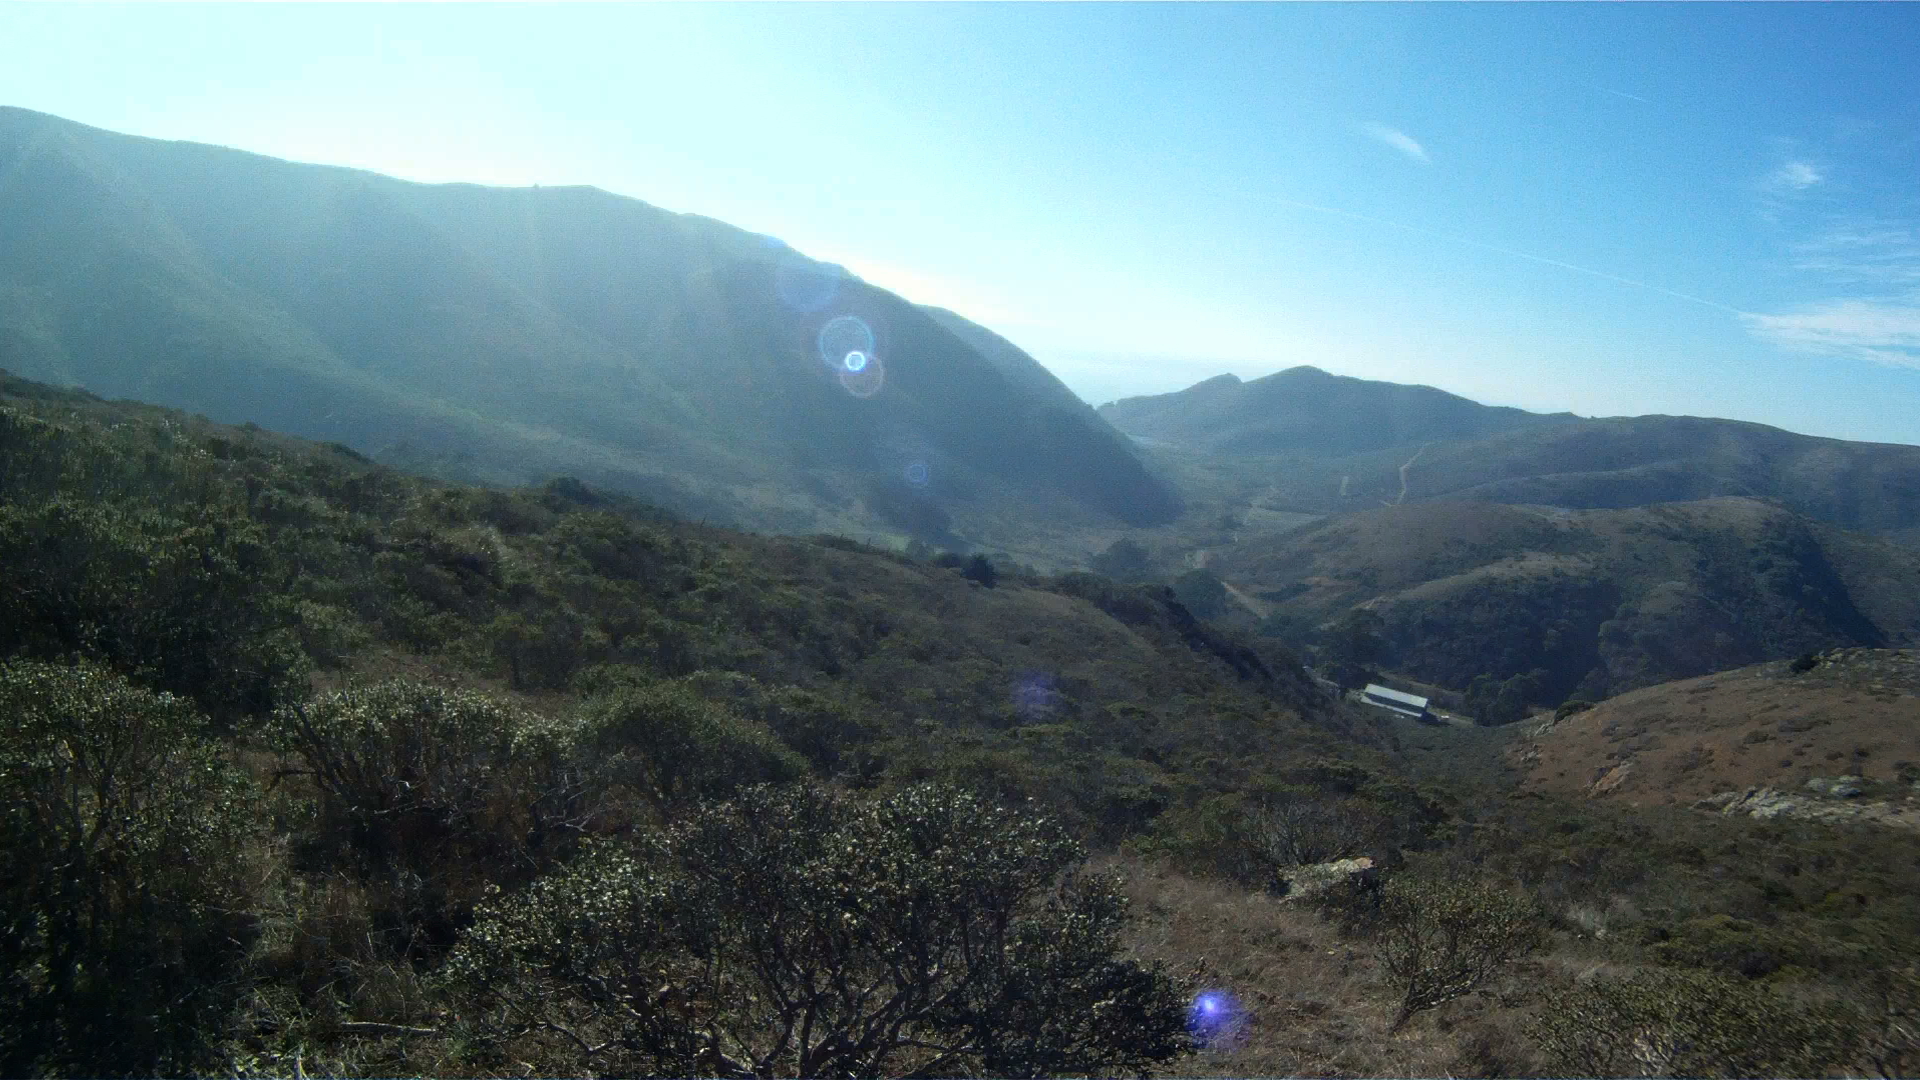
If you are up for a challenge, the Miwok Trail adds a degree of difficulty to your ride with its technical climb out of the Tennessee Valley back towards the Marin Headlands. With its horse trail stairs and deep ruts, this is no trail for beginners. Conquering this trail gives you appreciation for your front shock and builds your climbing prowess.
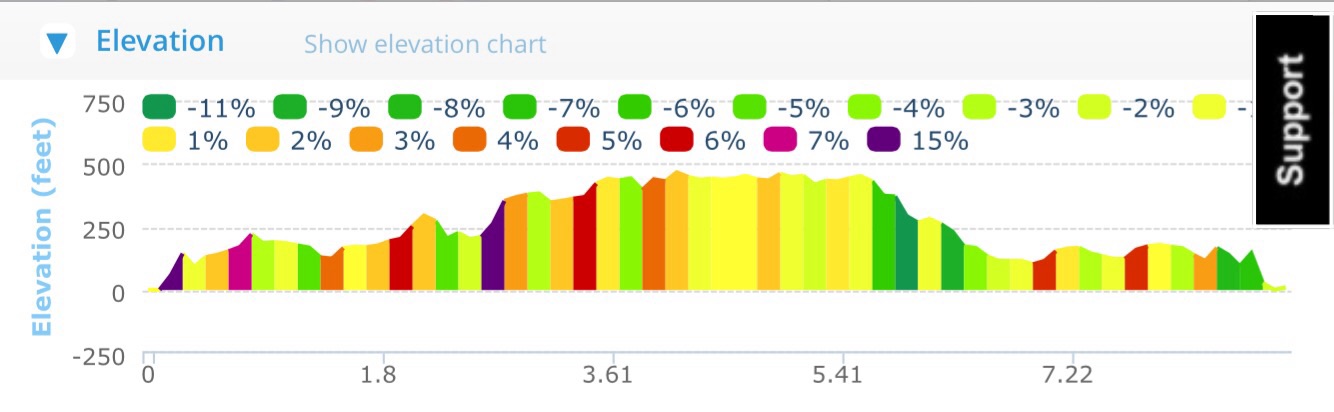
Distance: 5.75 miles (9.3 km)
Elevation Gain: 1068 feet (325 meters)
Difficulty: This trail has a technical assent with stairs and a fast descent back toward the Marin Headlands. This is definitely an intermediate ride.
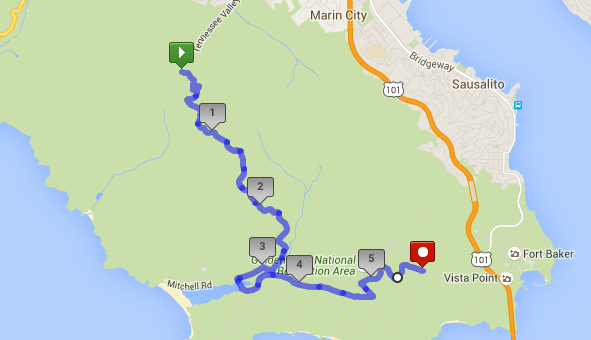
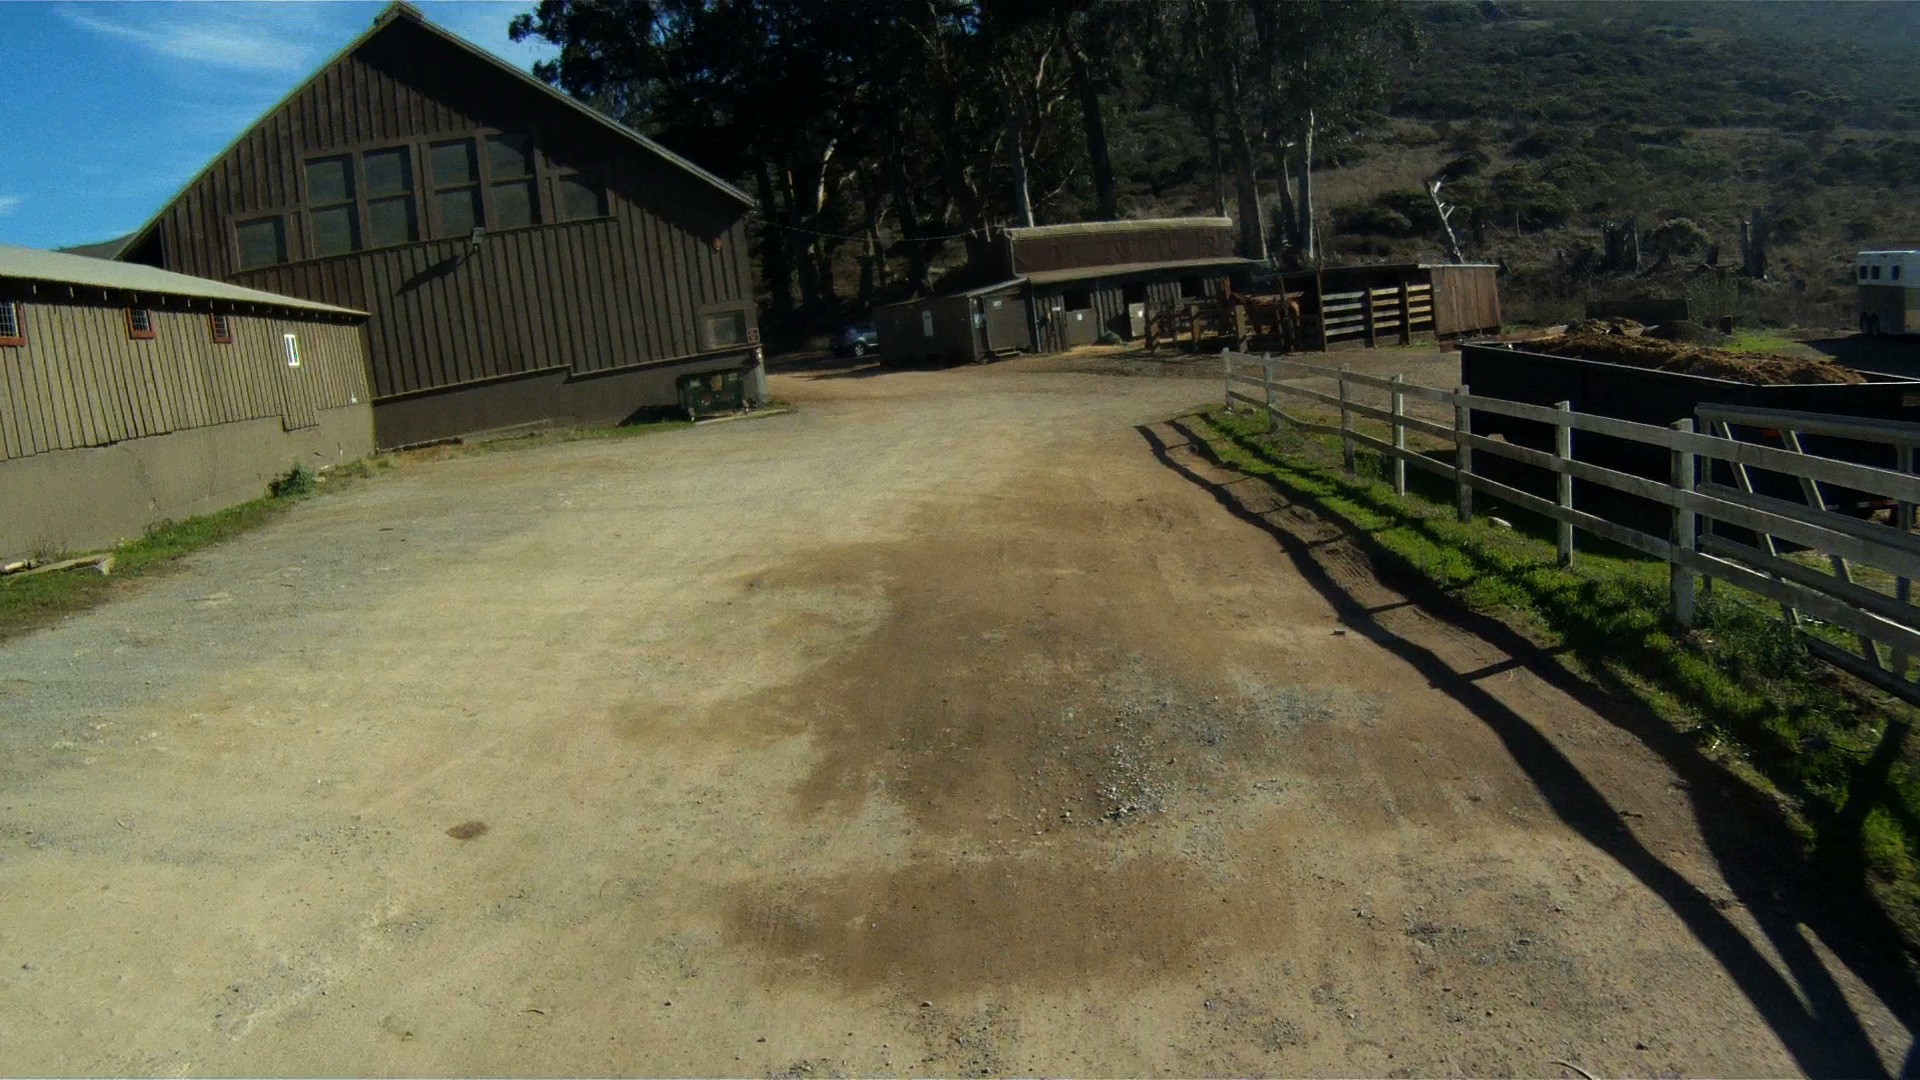
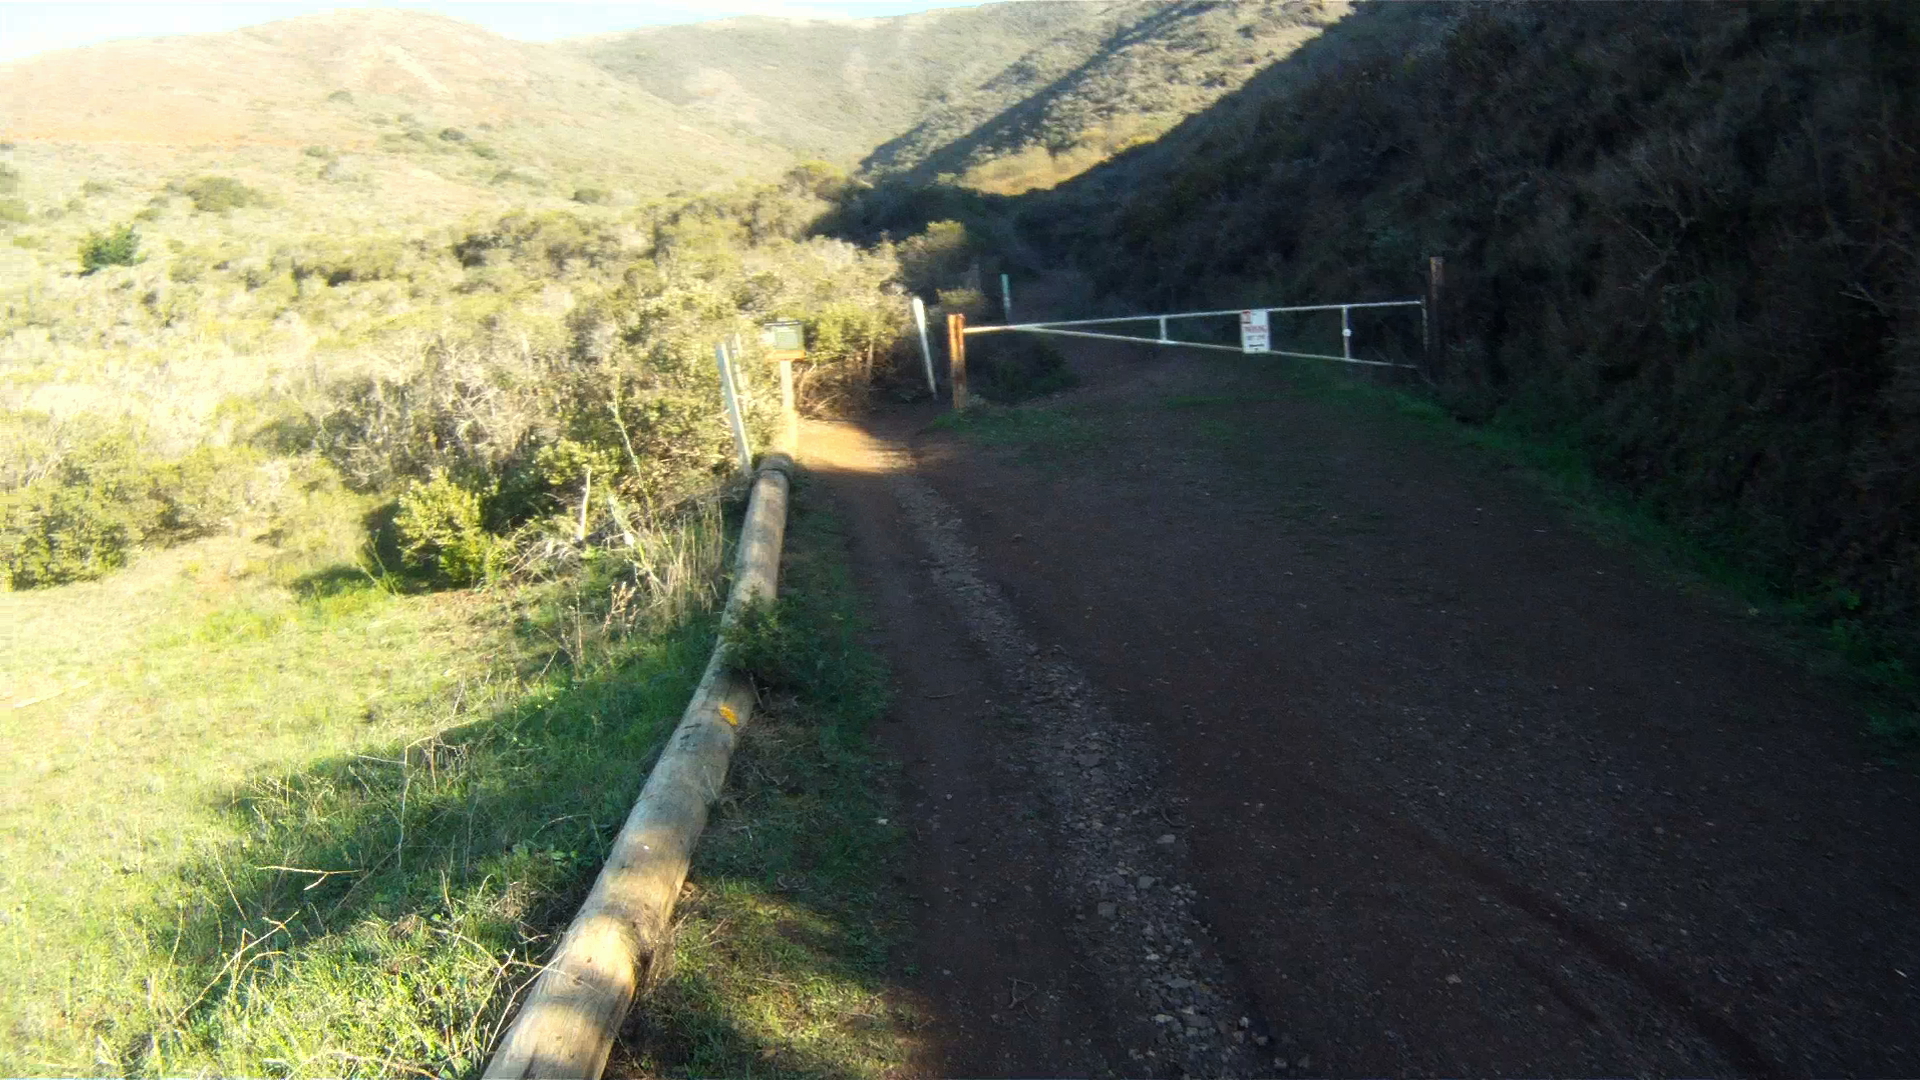
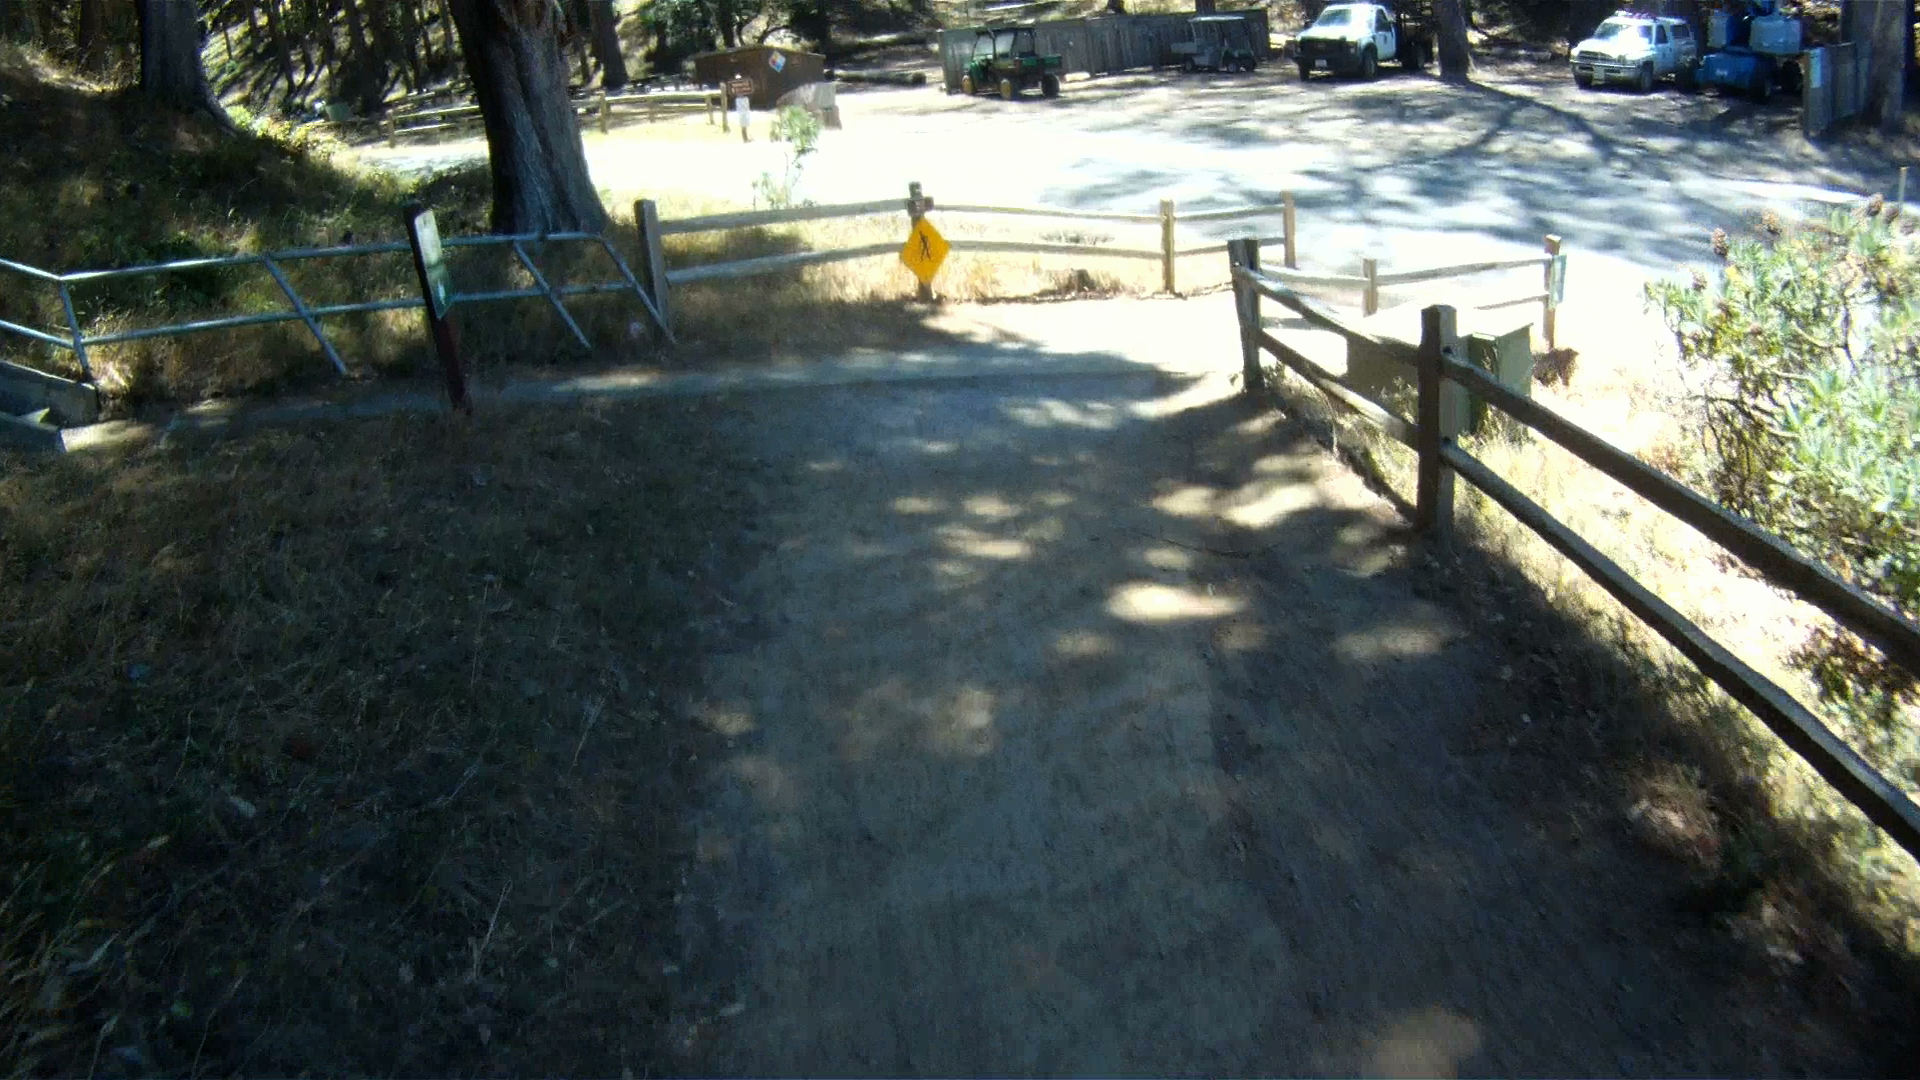
Starting at the Tennessee Valley parking lot, walk your bike through the Miwok Stables until you see the trail on the right next to the manure pit.
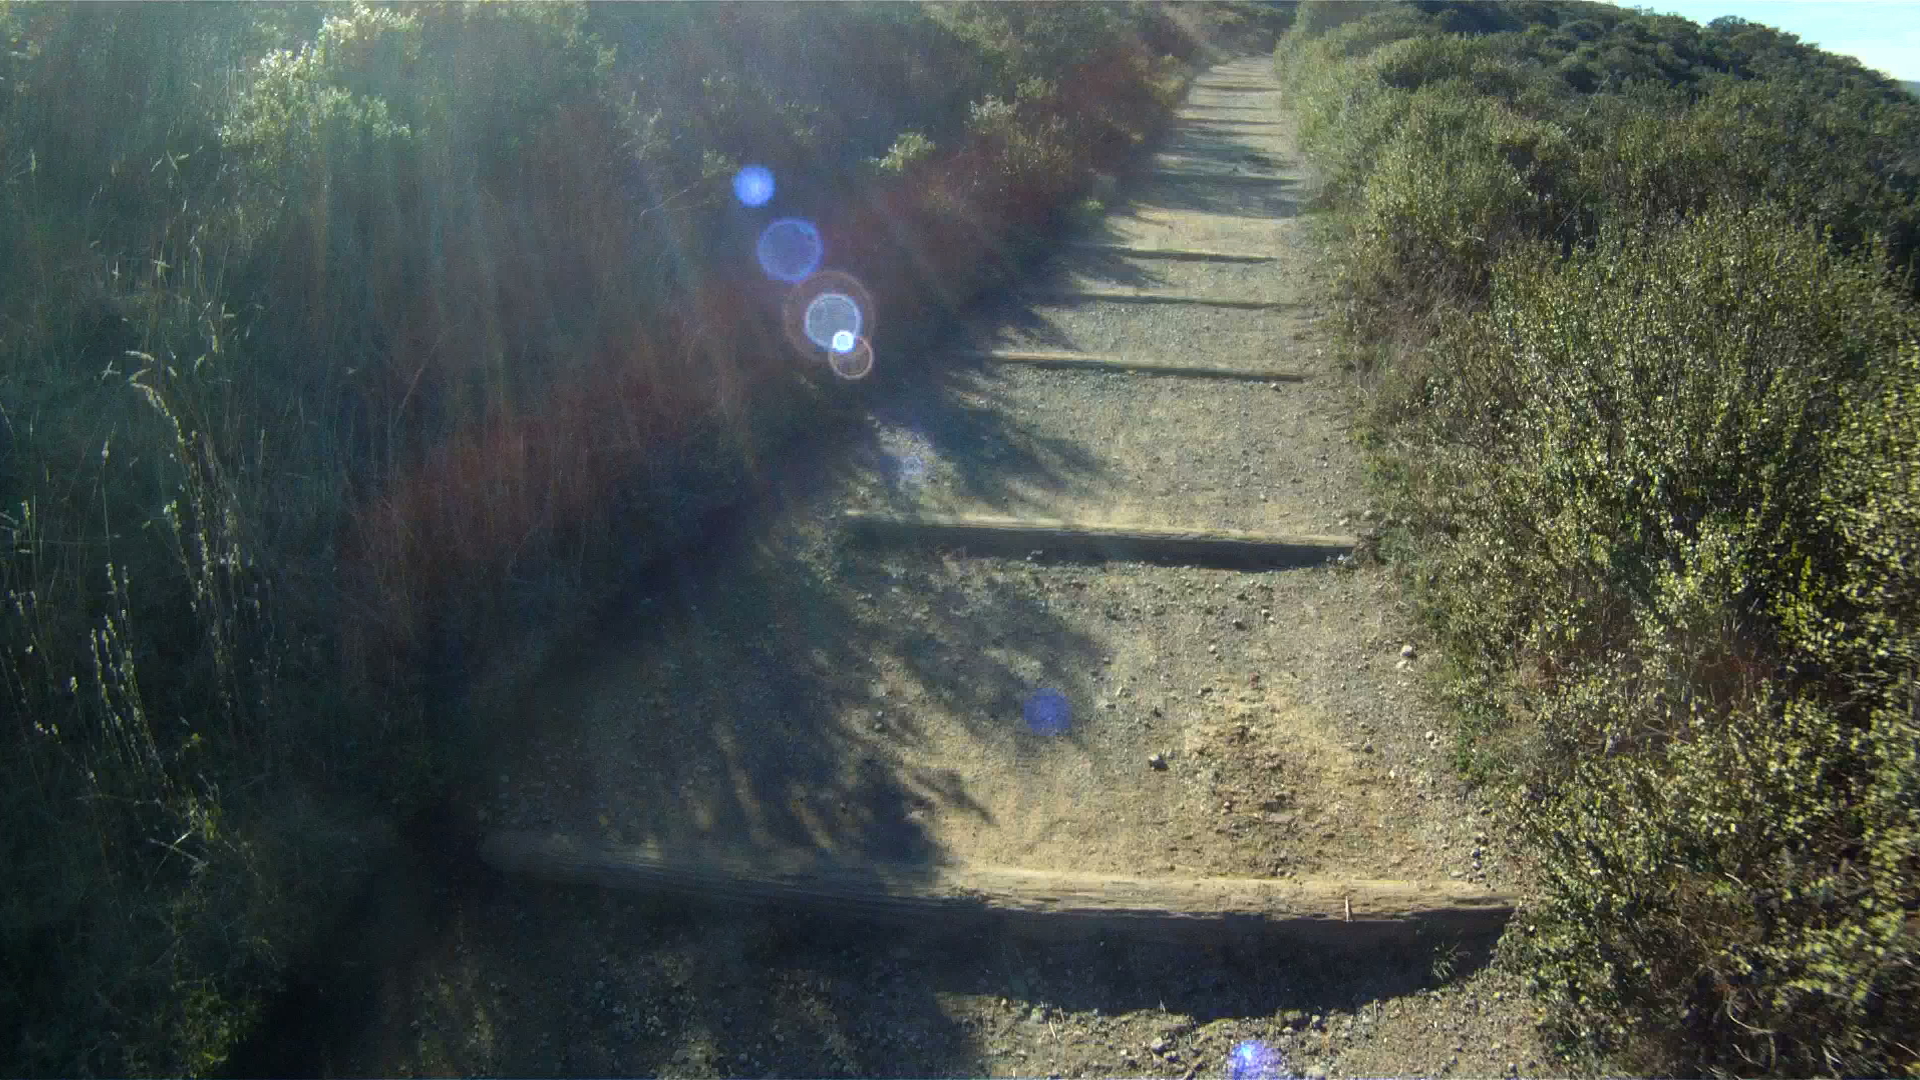
This is the beginning of the Old Springs Trail.
The Old Springs Trial has a series of stairs and bends as you climb the 1.3 miles to the Miwok Trail.
This trail can get technical in spots where the dirt gets larger rocks and the pitch increases.
Continue to follow the Miwok Trail as it continues to roll over the wooden bridges before turing onto the Miwok Trail.
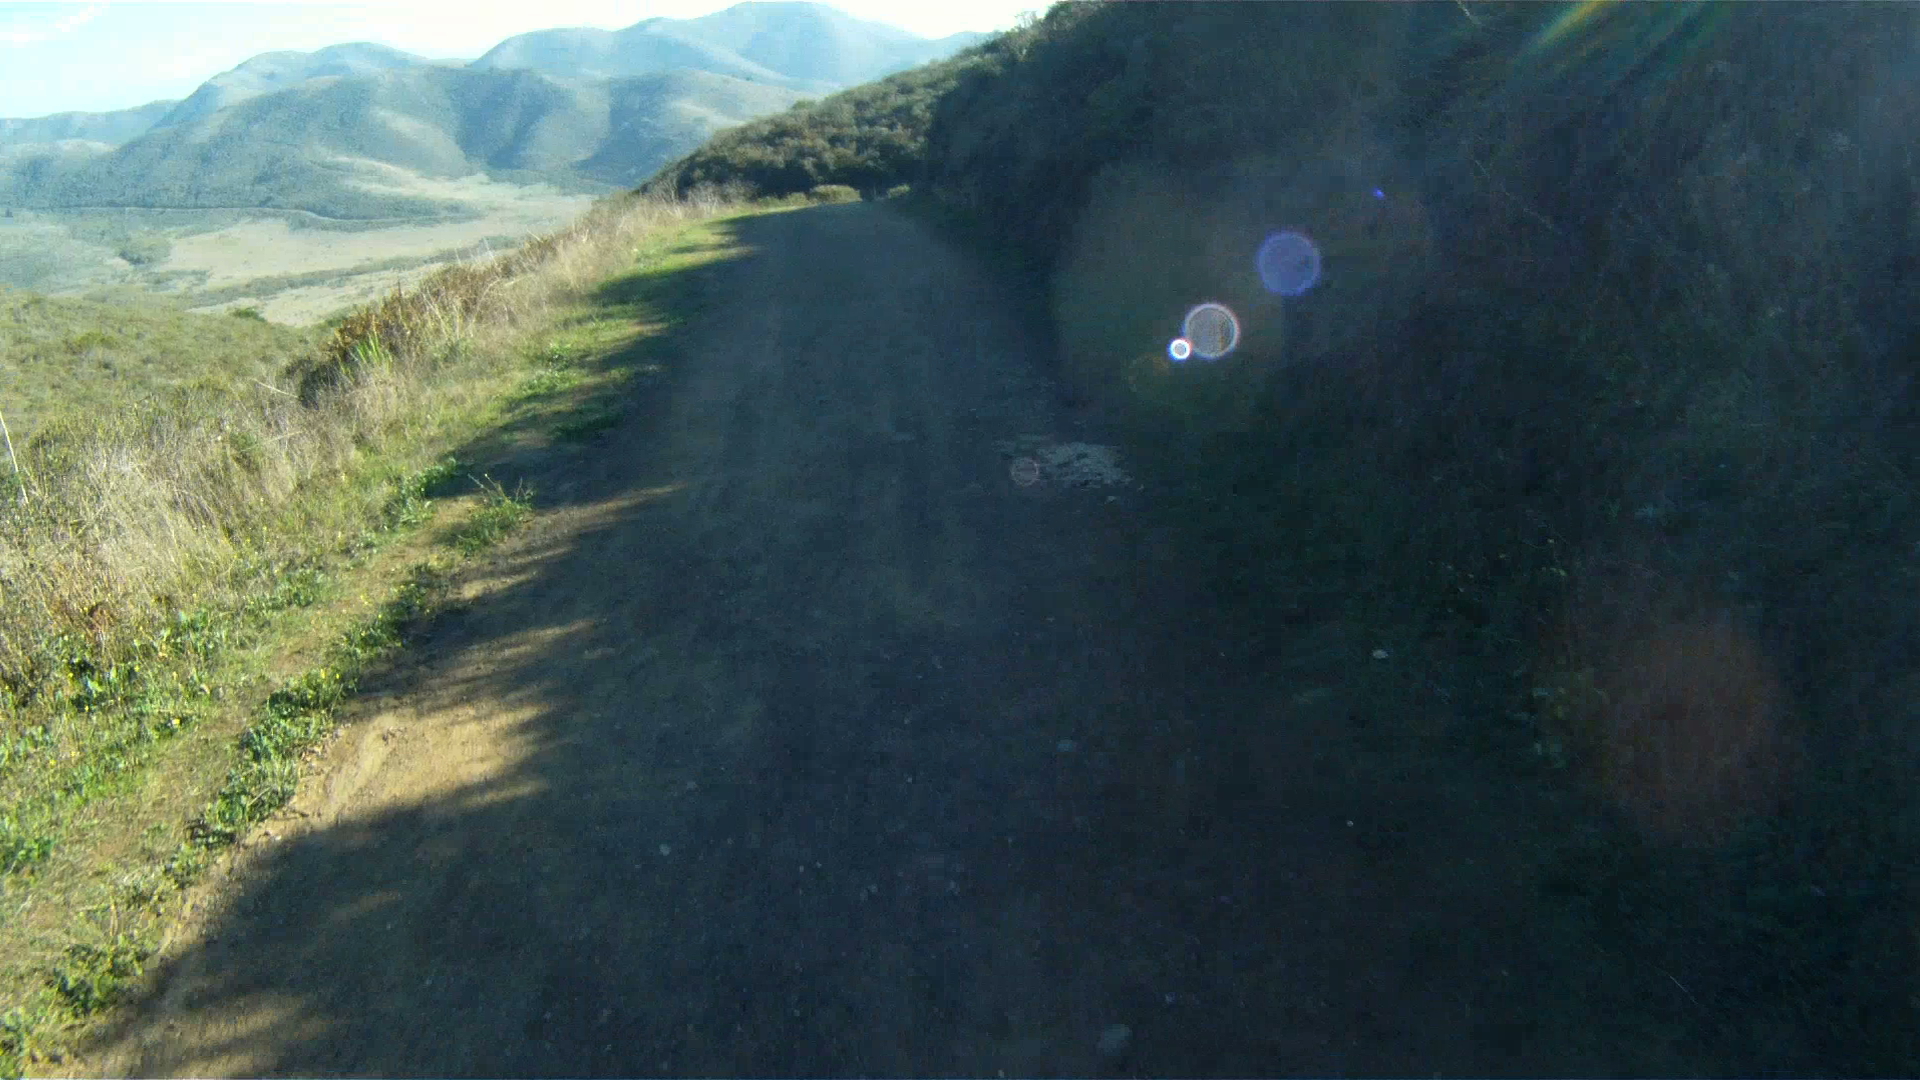
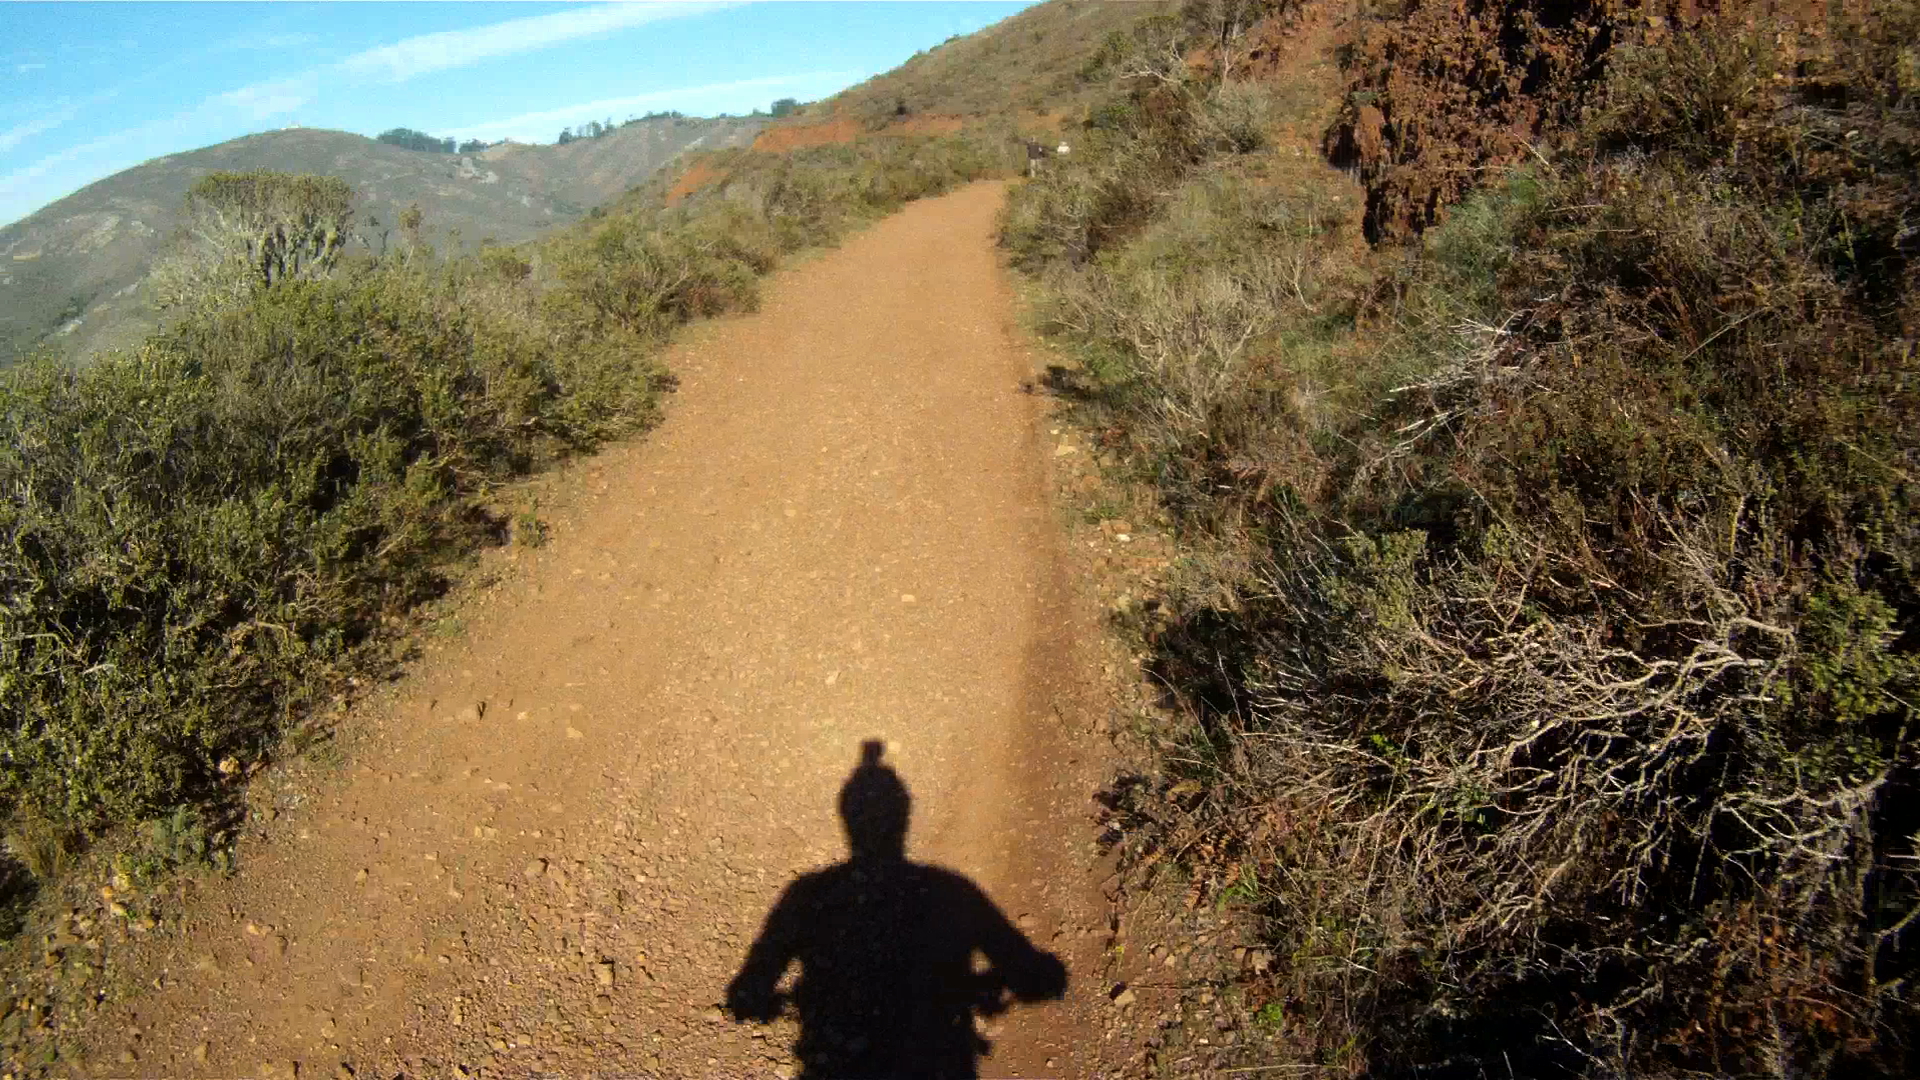
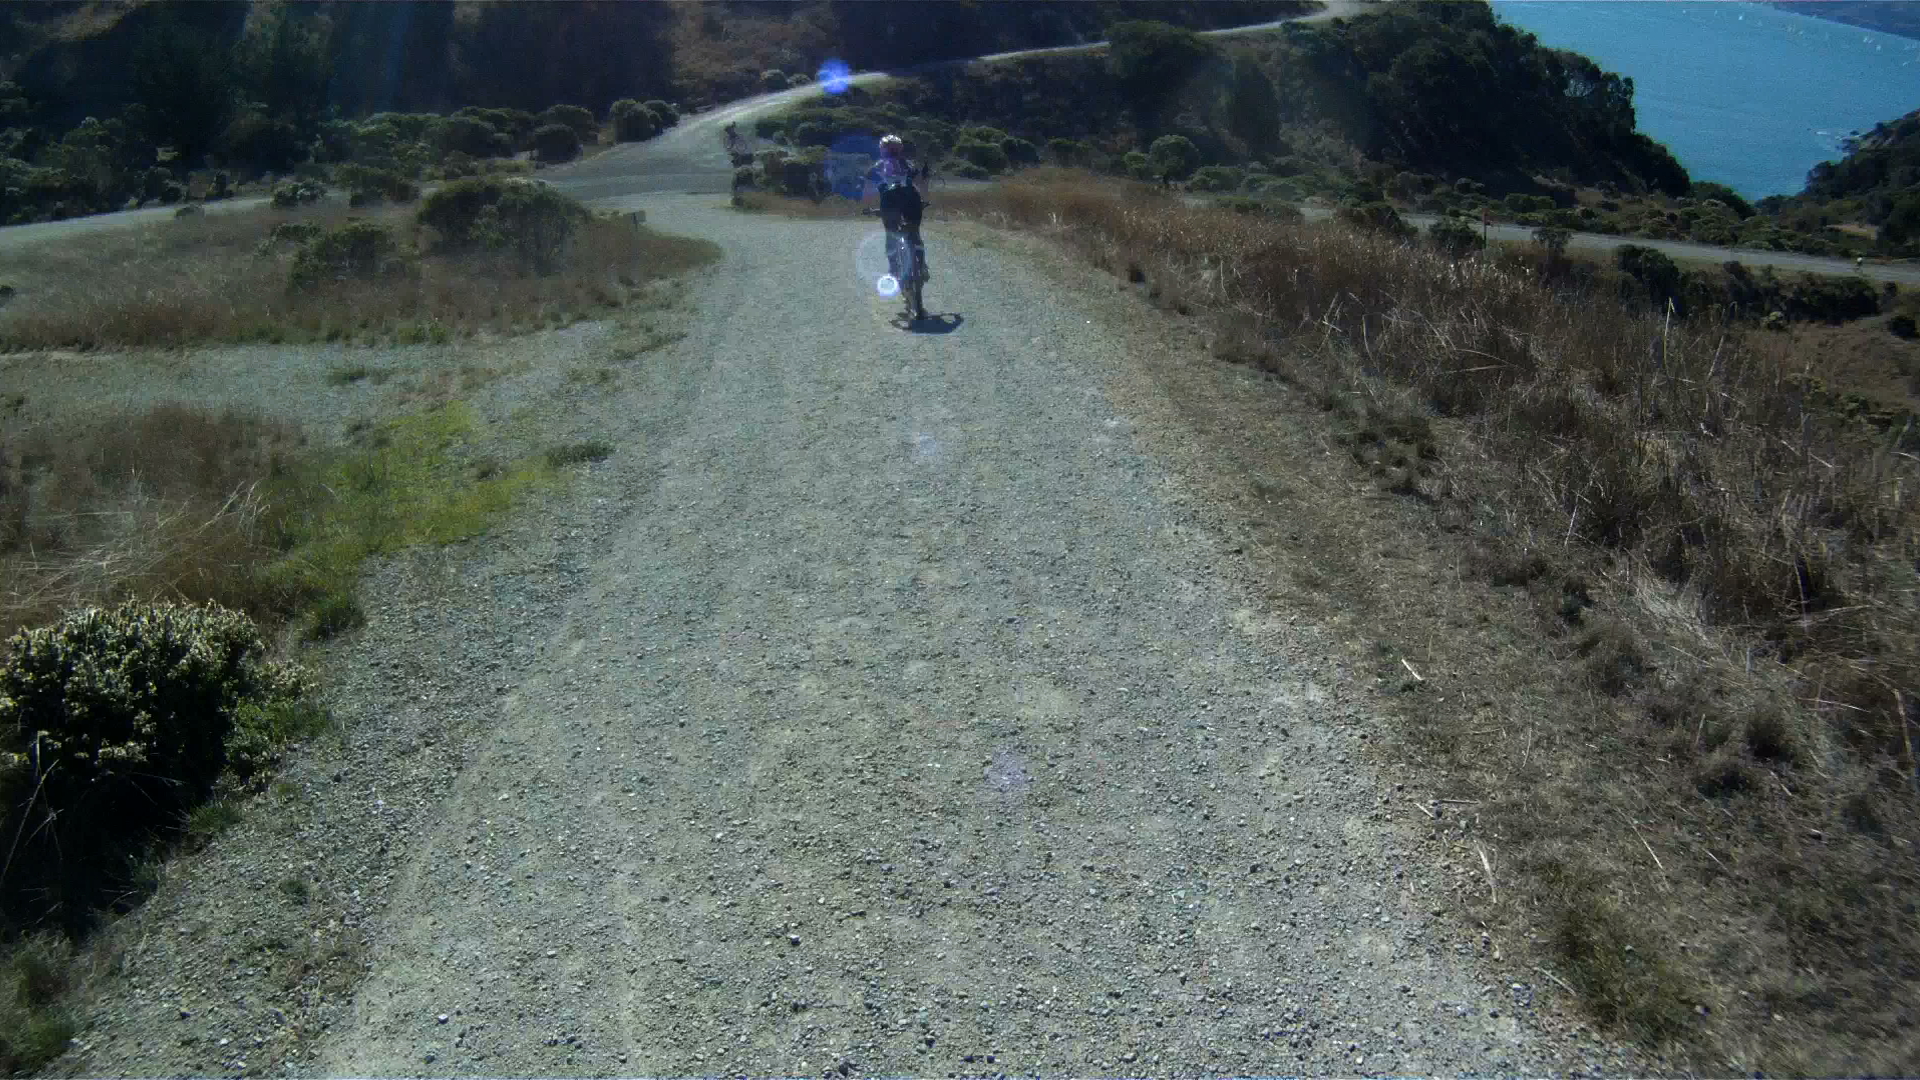
At the top of Old Springs Trail, make a right onto the Miwok Trial and start the descent.
The descent is fast, so check your brakes and stay in control. Watch out for the deep ruts and hikers on the descent as well.
As the descent flattens out, watch for a turn to the left to return to the Bobcat trail and the Marin Headlands. The left turn is 2.75 miles from the start. If you make the left, watch for a quick right just after a set of stairs. Follow this trail for a few hundred feet to the bridge and make a right, then a left on the other side of the bridge to return to Bunker Road.
Or…
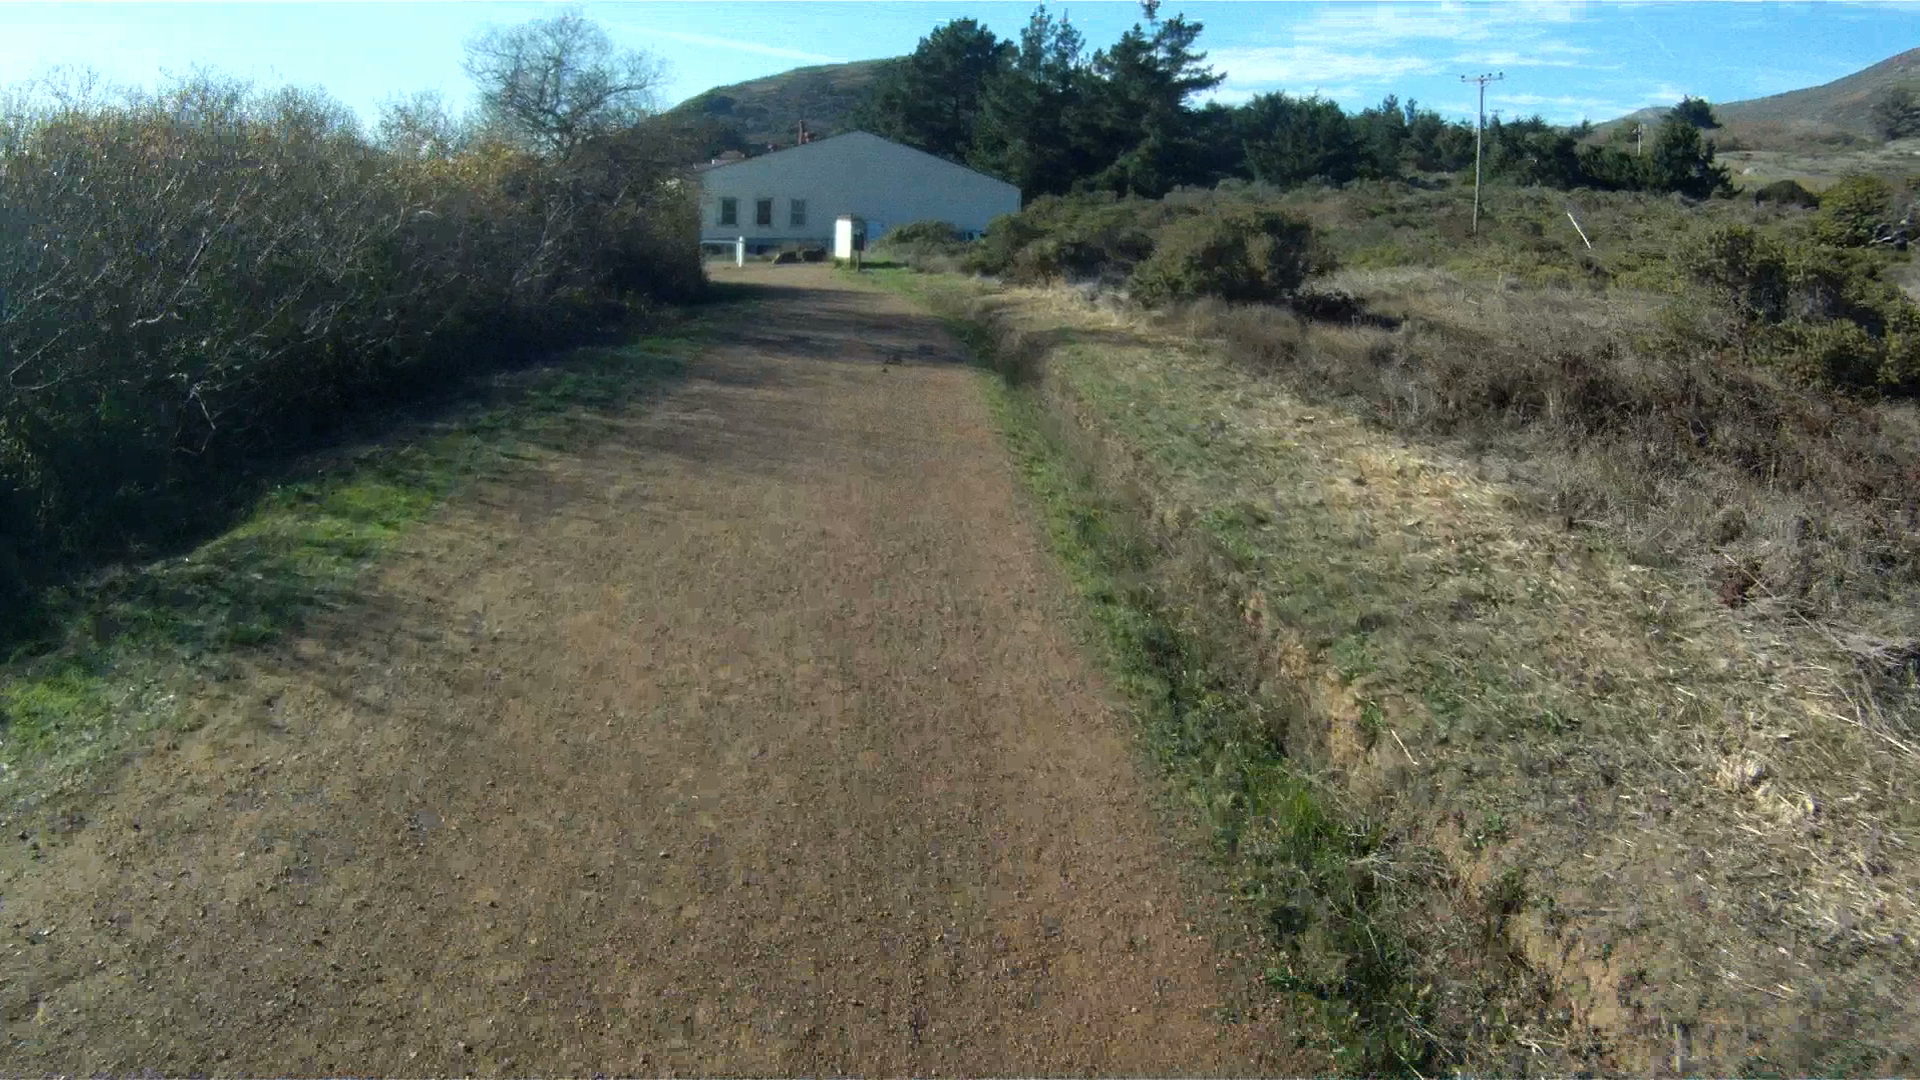
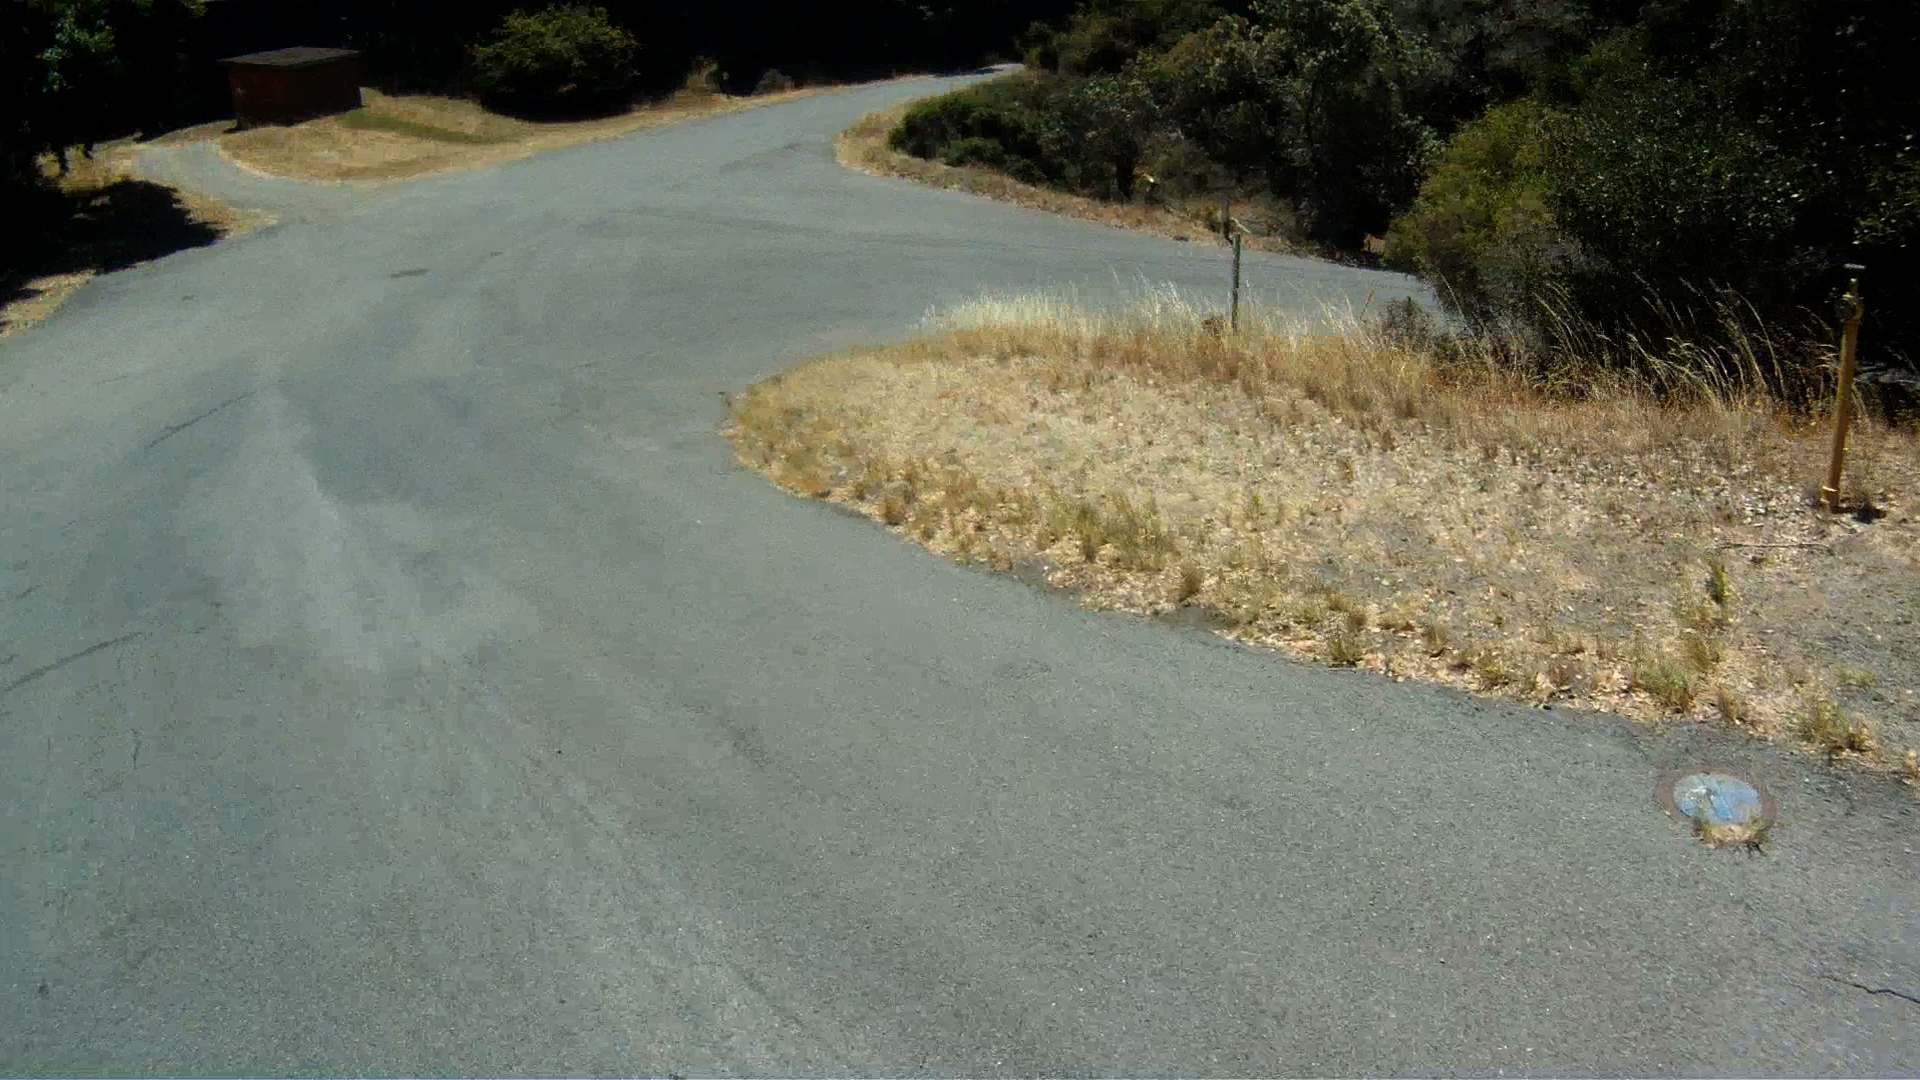
If you miss the turn (like I did on this particular run), continue straight on the Miwok Trail and you will end up in a parking lot along Bunker Road.
Make a left on Bunker Road and follow it to the entrance to the Coastal Trail on your right, the same trail you came down on our Bobcat Trail route.
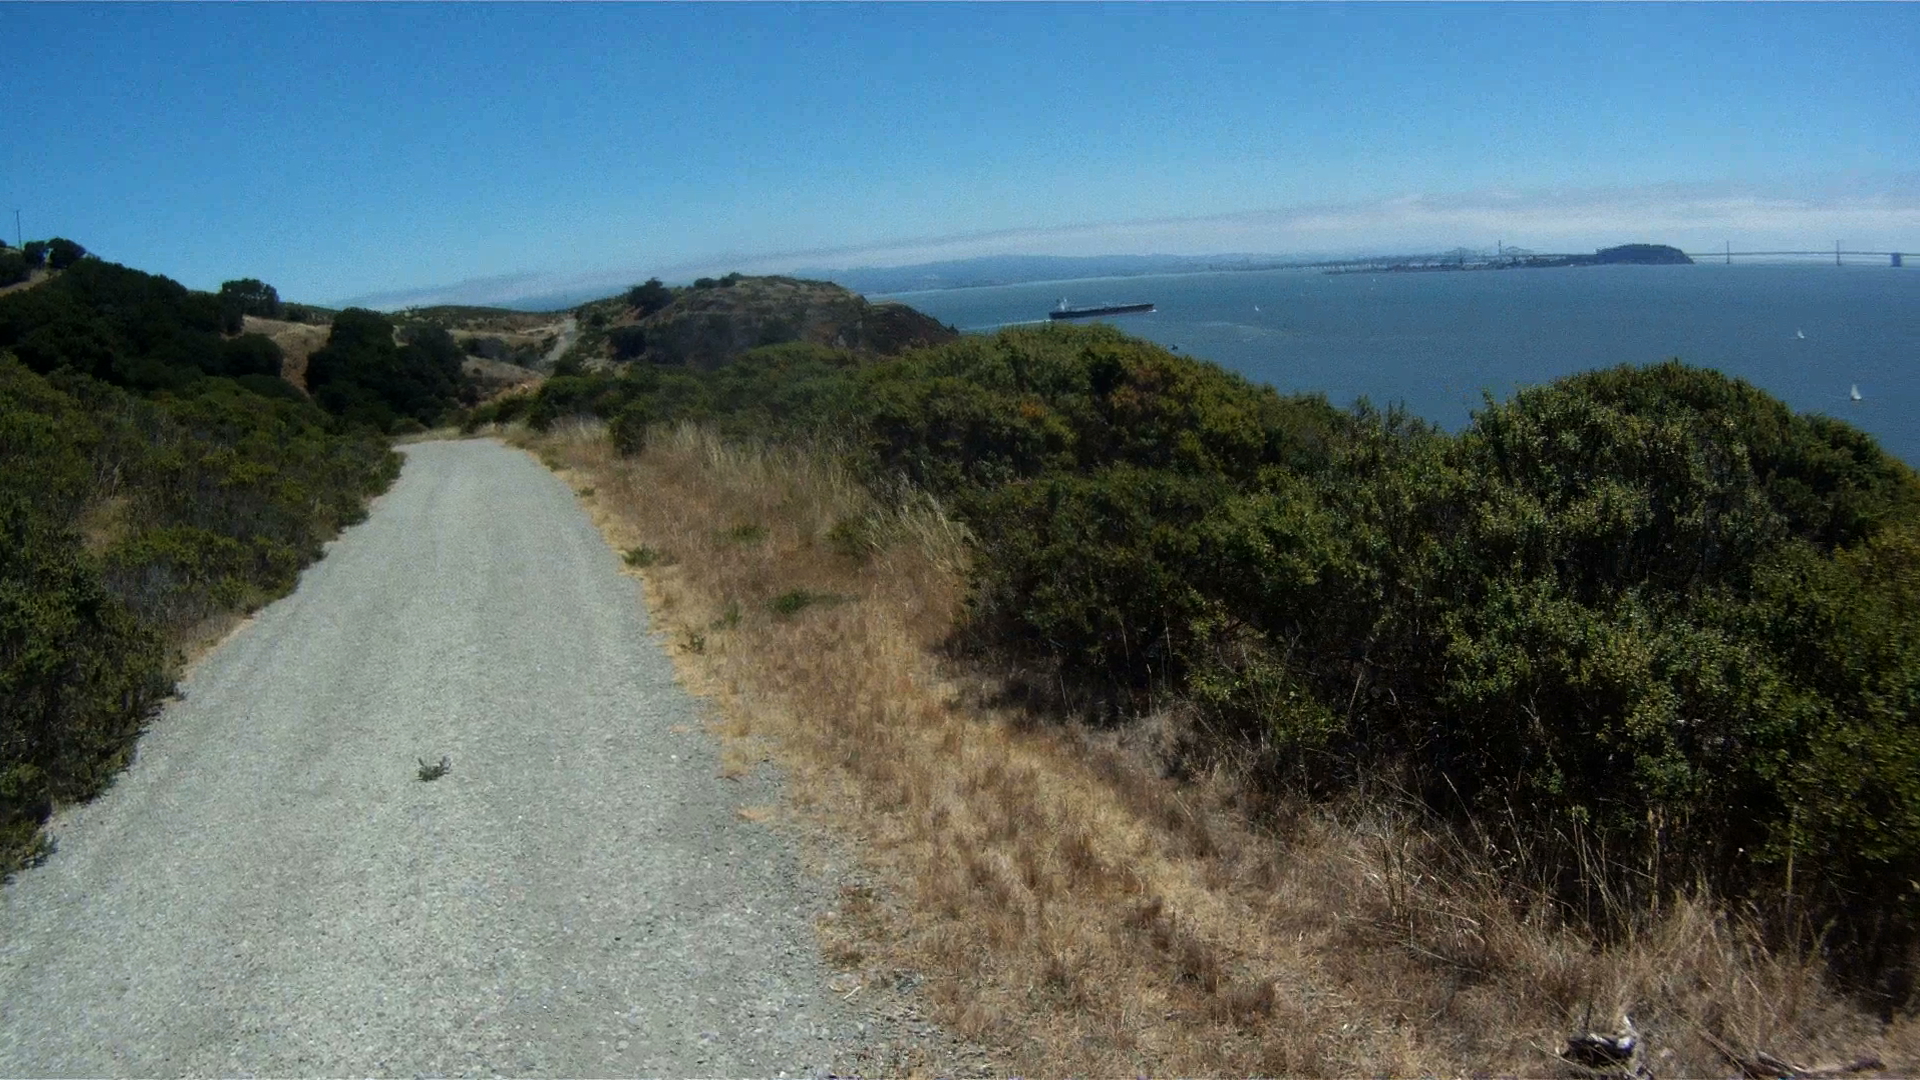
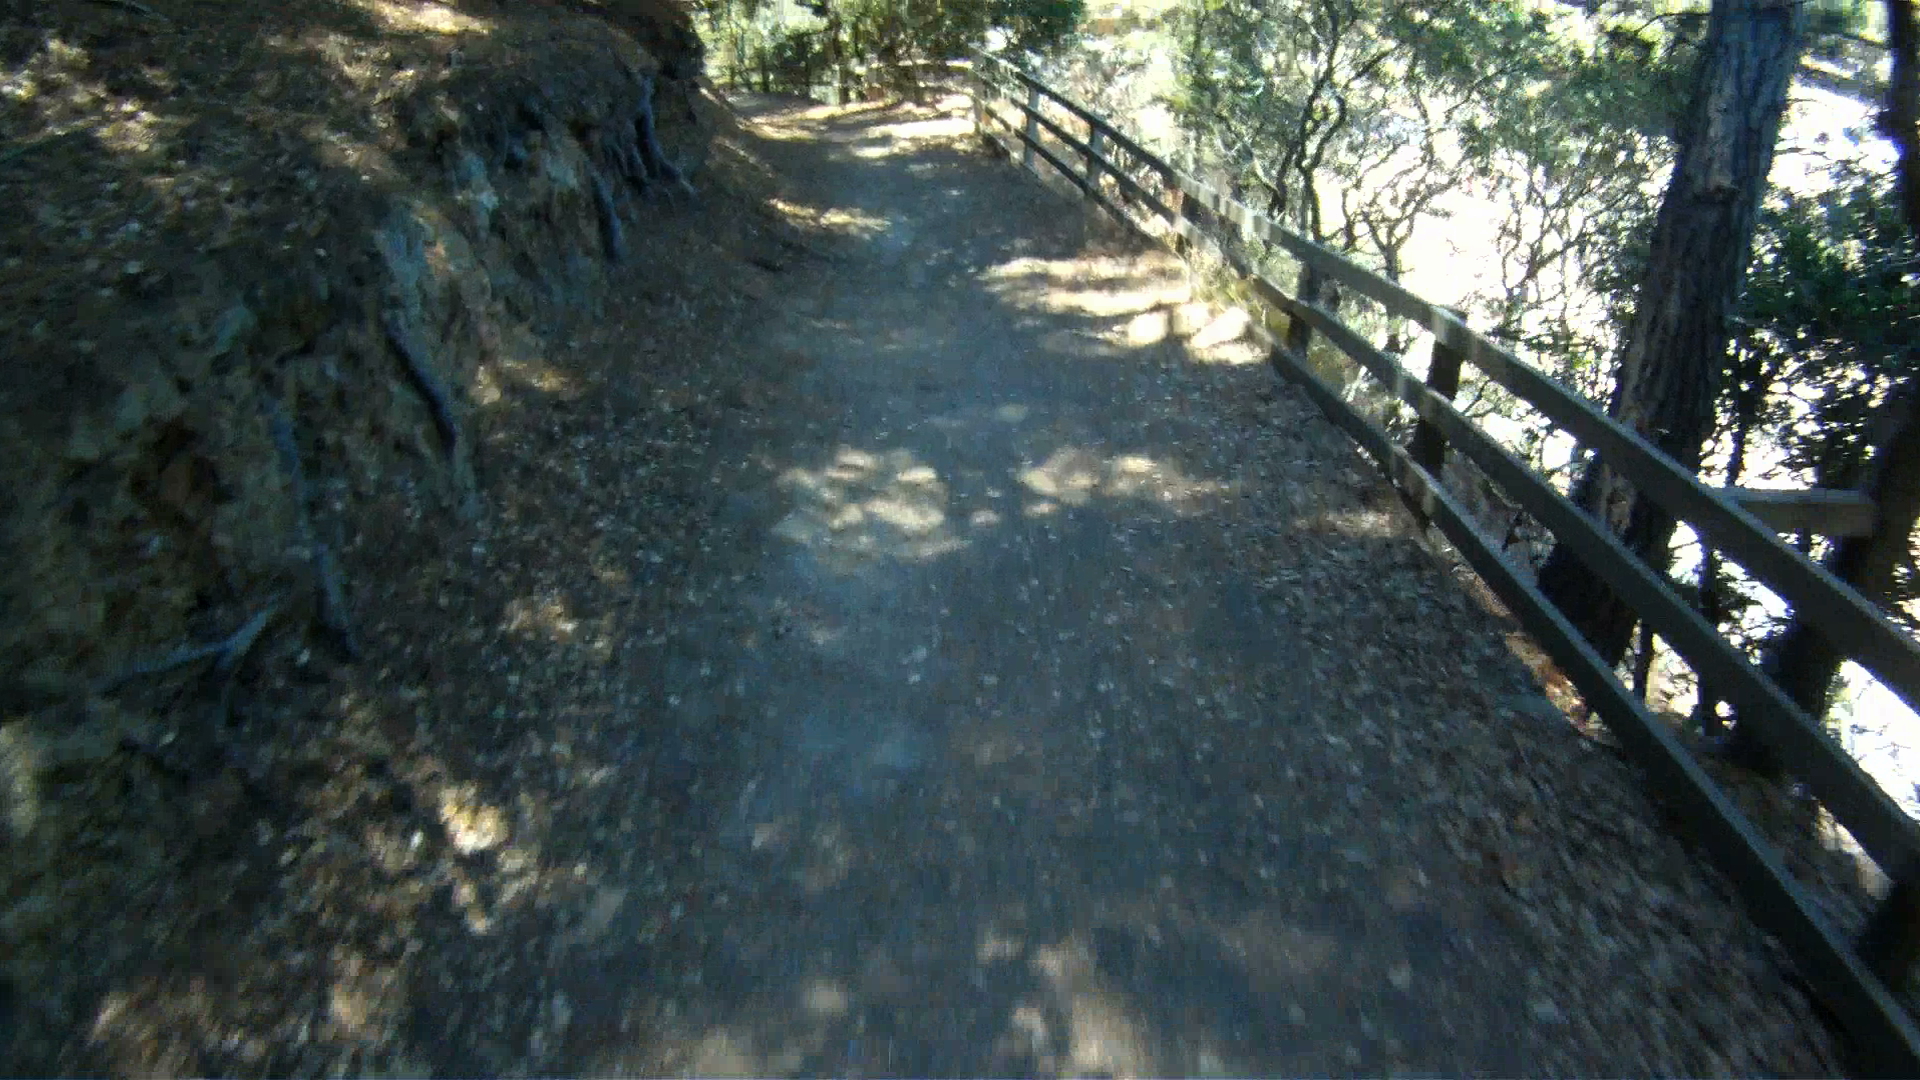
Follow the Coastal Trail as it climbs its way back to the roundabout in the Marin Headlands.
Go through the gate and start up the trail.
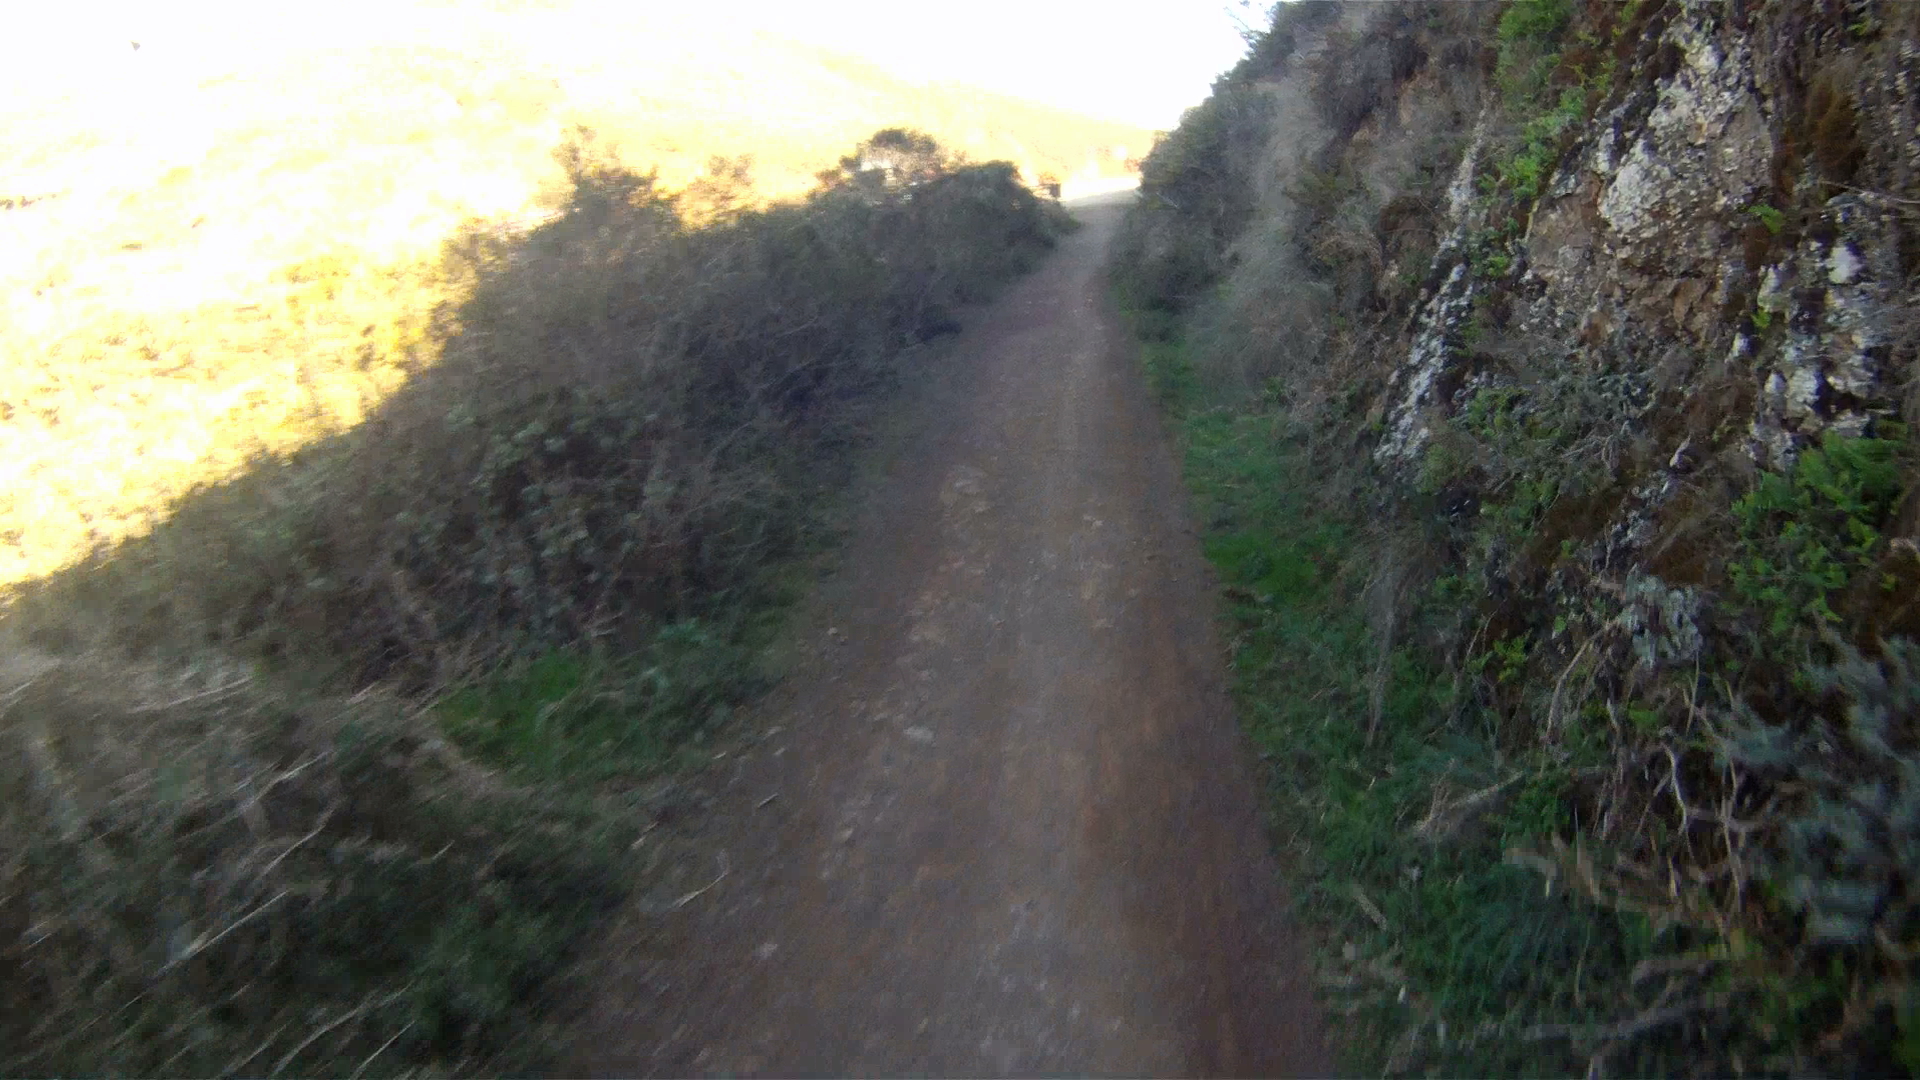
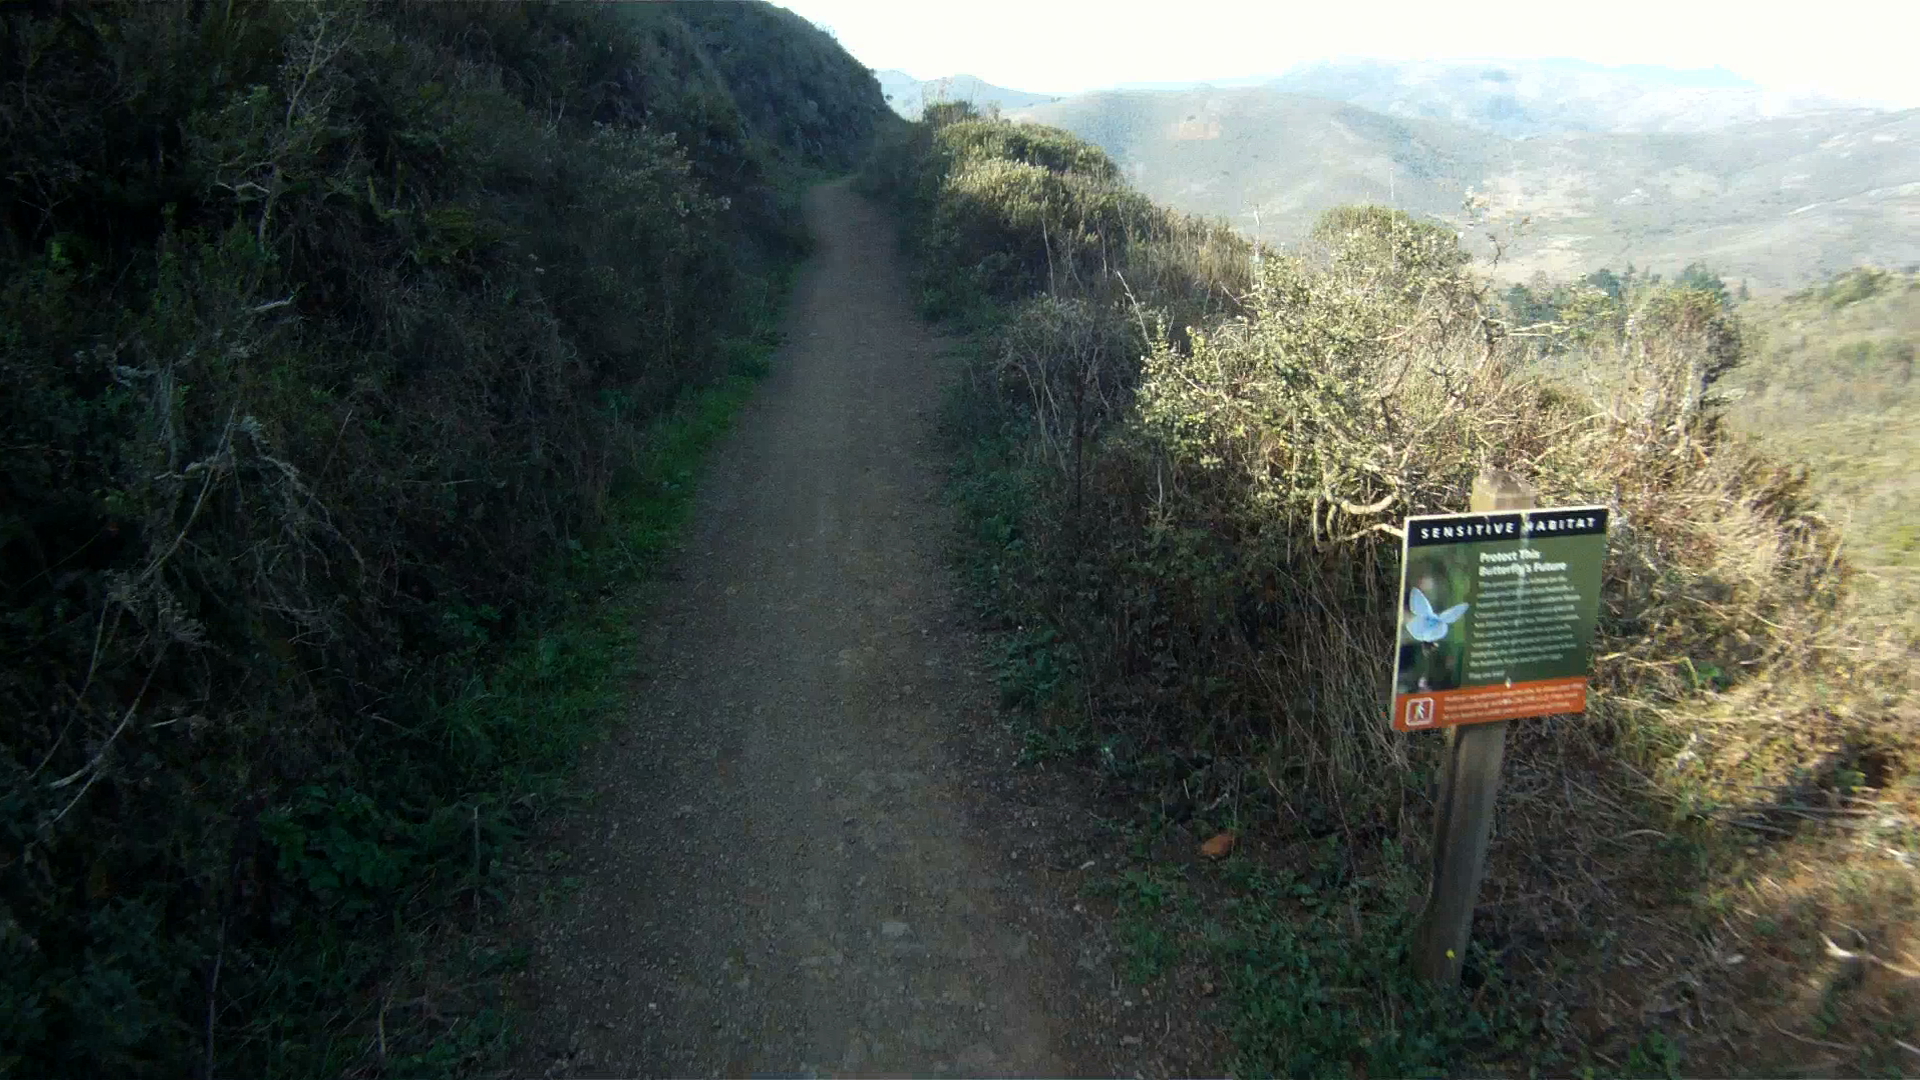
As you experienced on the way down, this trail narrows in places and has loose rock in others.
Continue winding your way back up the trail and through the narrow single-track.
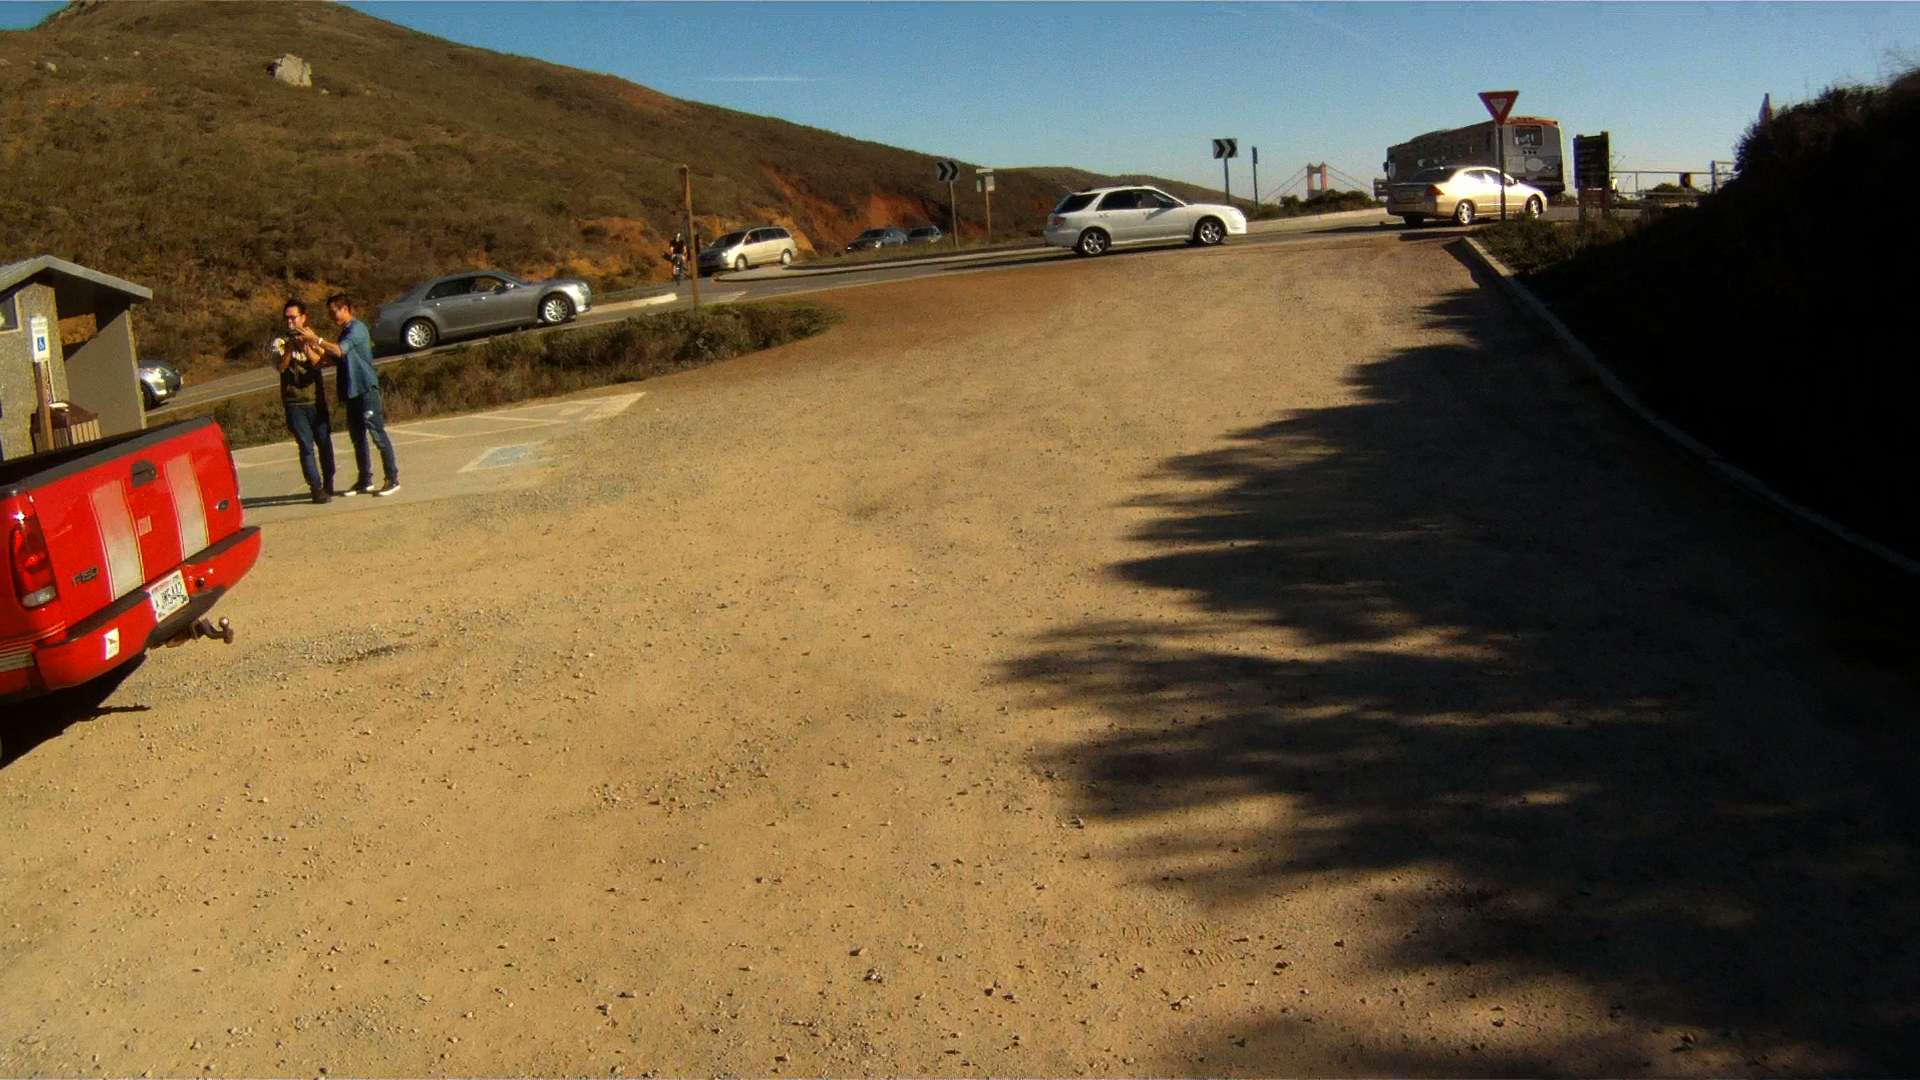
At the top of the climb, you’ll be back at the parking lot next to the roundabout and will be able to see the familiar red paint on the North Tower of the Golden Gate Bridge.
While challenging, the Miwok Trail is rewarding not only for the views, but also the sense of accomplishment once you realized what your mountain bike and you can do! Enjoy and stay safe.
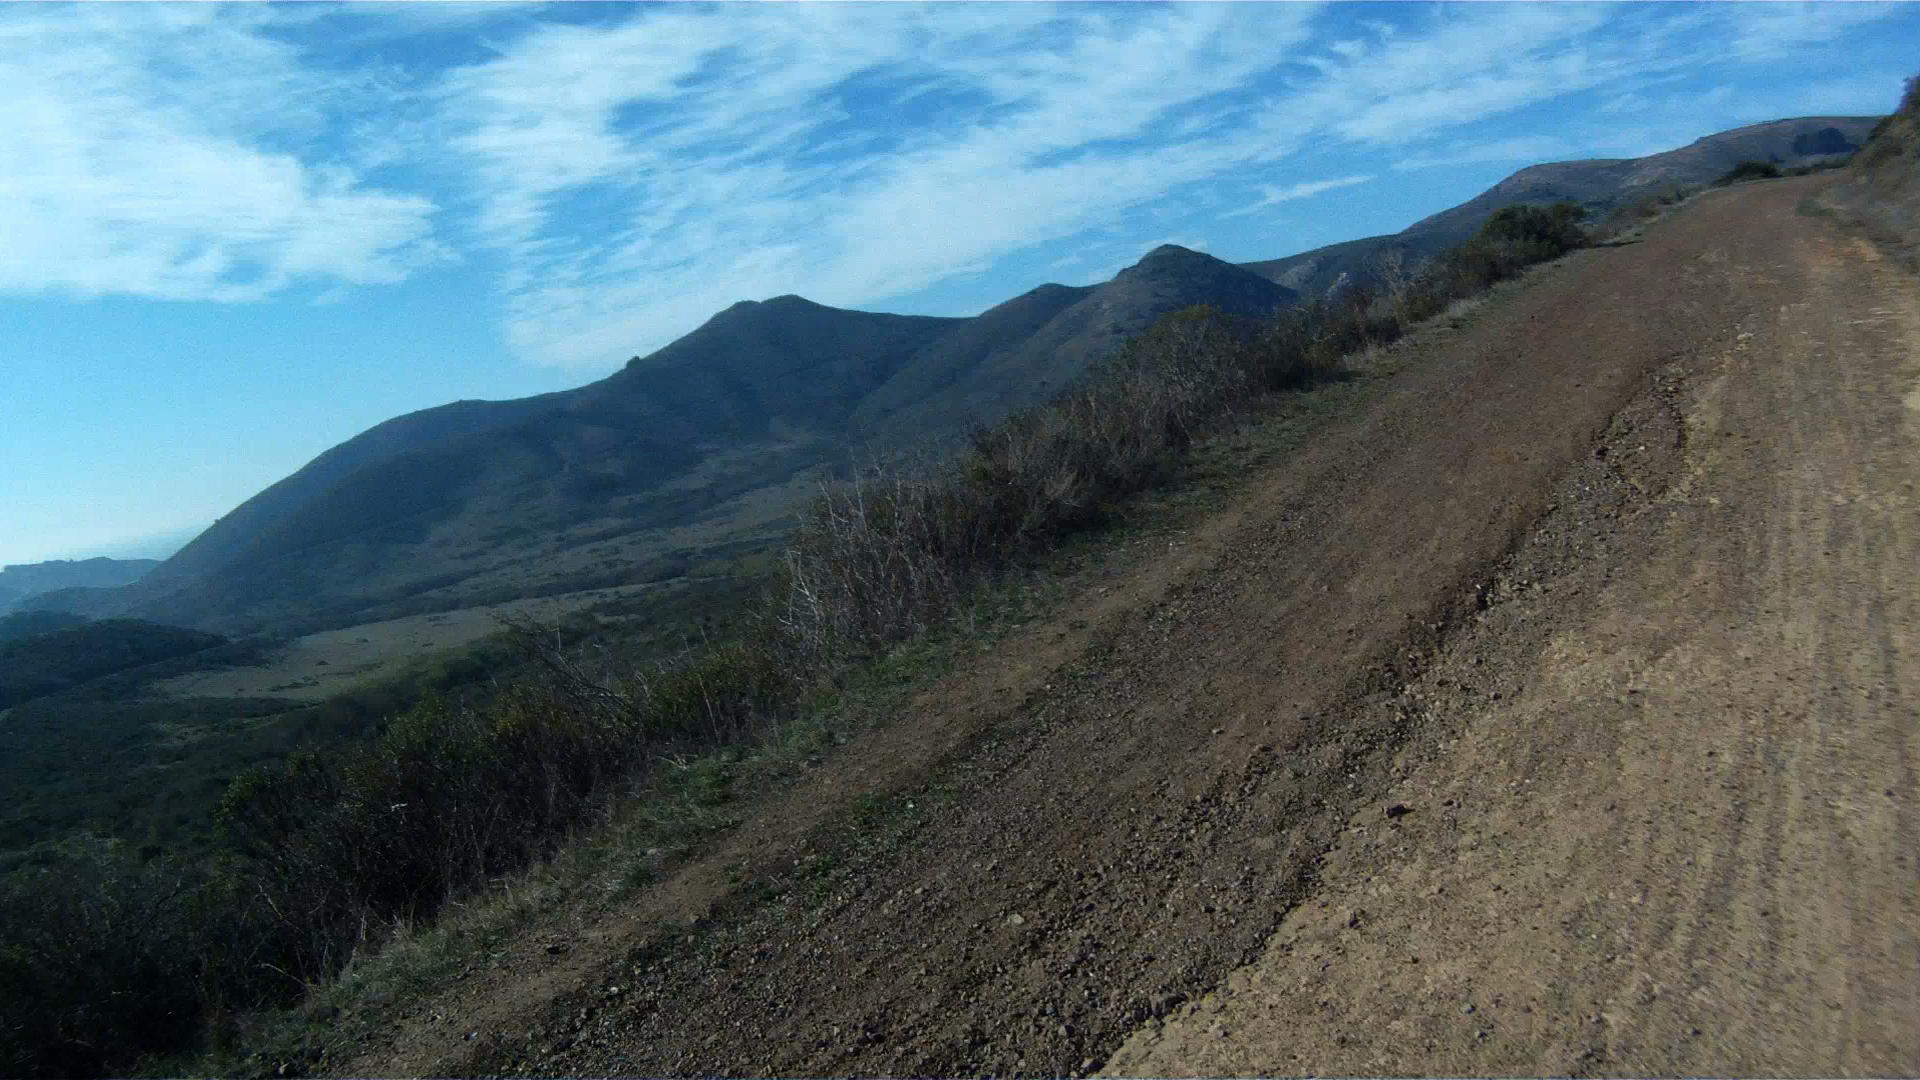
Mountain biking was invented in Marin County and there are numerous trails you can ride as you get deeper into Marin County. However, if you live in San Francisco, don’t have a car, or just don’t want to drive your bike to the trail, then there are a few trails just on the other side of the Golden Gate Bridge that you can ride to from the City. The first of these is the Bobcat Trail. This is a beautiful, but steep route which takes you up and down the Marin Headlands and then winds its way to Tennessee Valley.
Distance: 6.3 miles (10.1 km)
Elevation Gain: 943 feet (287 m)
Difficulty: The loose terrain and ruts in the single track portion of the ride is a bit difficult, but the remainder, while steep, is wide and smooth. This is a good ride for intermediate cyclists.
Starting at the roundabout on Conzelman Road, about halfway up the Marin Headlands route, head past the restroom and to the dirt trail. Follow the trail as it winds down the back of the headlands to Bunker Road.
Make a left at Bunker Road and follow it a few hundred feet to the next dirt trail which heads toward a parking lot on along Bunker Road.
Continue following the trail and make a right to cross over the bridge.
After the bridge, make a left at the intersection to continue on the trial.
The trail merges with the Bobcat Trail at a tight intersection, watch for oncoming bikers and hikers as you turn right onto the Bobcat Trail.
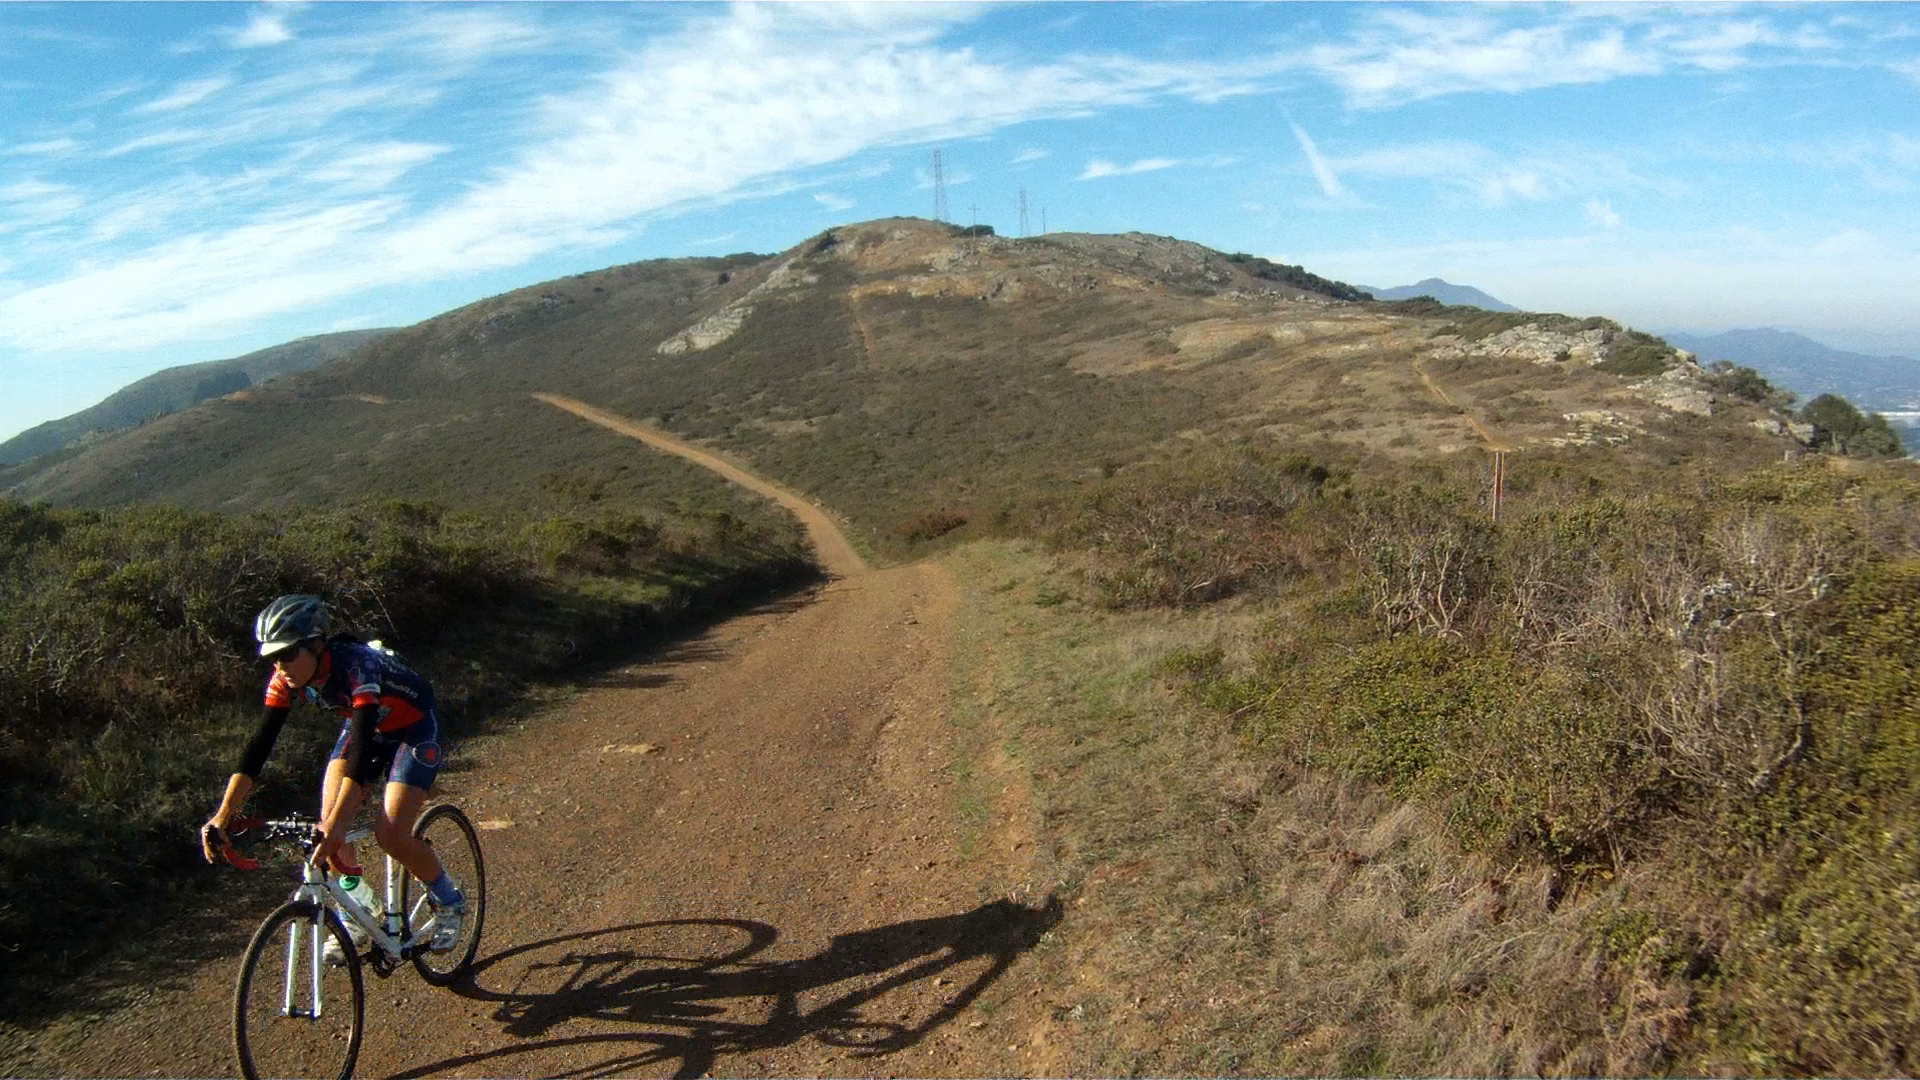
Follow the Bobcat Trail as it winds its way up and over the hills for the next two miles to the next trail intersection.
Continue along Bobcat Trail to the left down the deep descent.
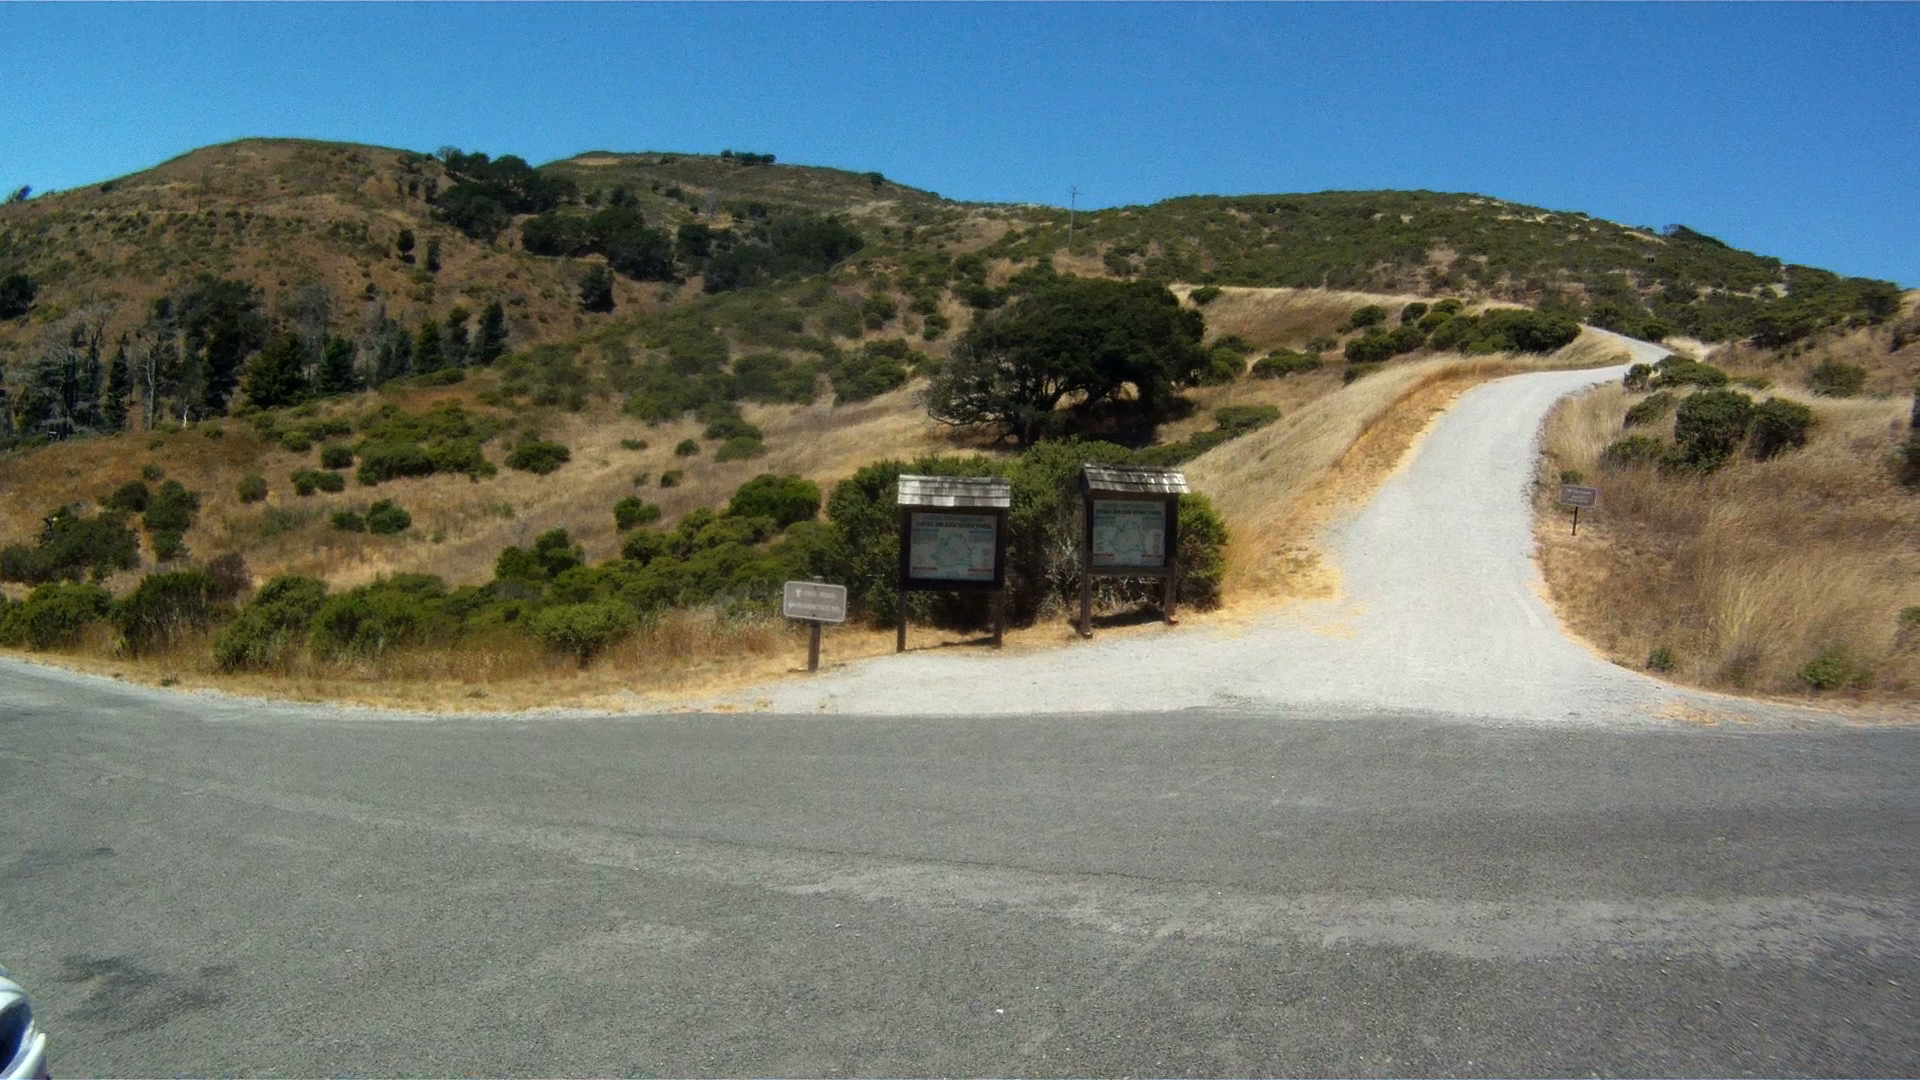
Continue climbing until the Bobcat Trail turns into the Marincello Trial and continue toward the right as the trail crests.
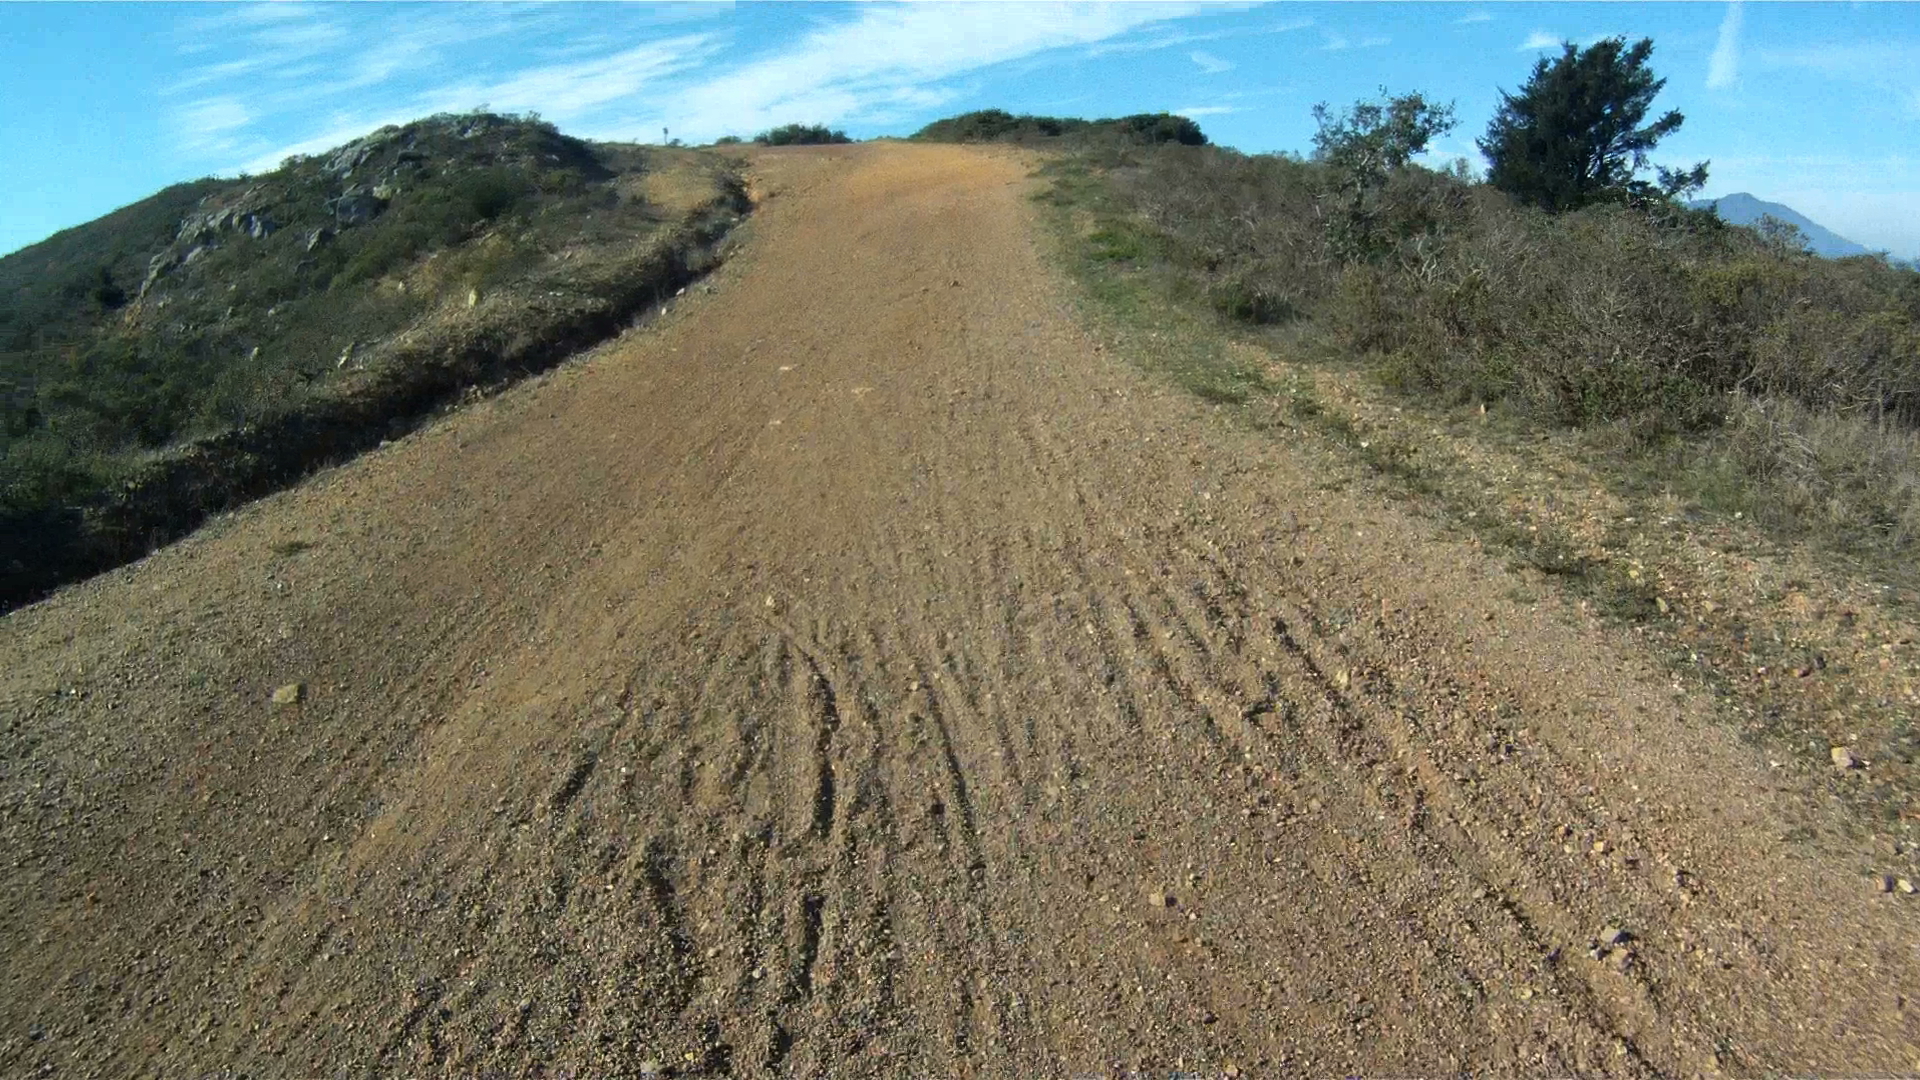
After the crest of the hill, check your brakes, take the fork to the right and get ready to descend then next 1.5 miles to the Tennessee Valley trailhead parking lot.
Where this route ends, your next choice begins. You can either head back to Sausalito via Tennessee Valley Road and the Marin Crossroads. Option 2 is to ride the Tennessee Valley trail to Tennessee Beach or the Coastal Trail. The final option is to ride back to the Marin Headlands via the Miwock Trail after walking your bike past the stables. Stay tuned to for future installments and trails.
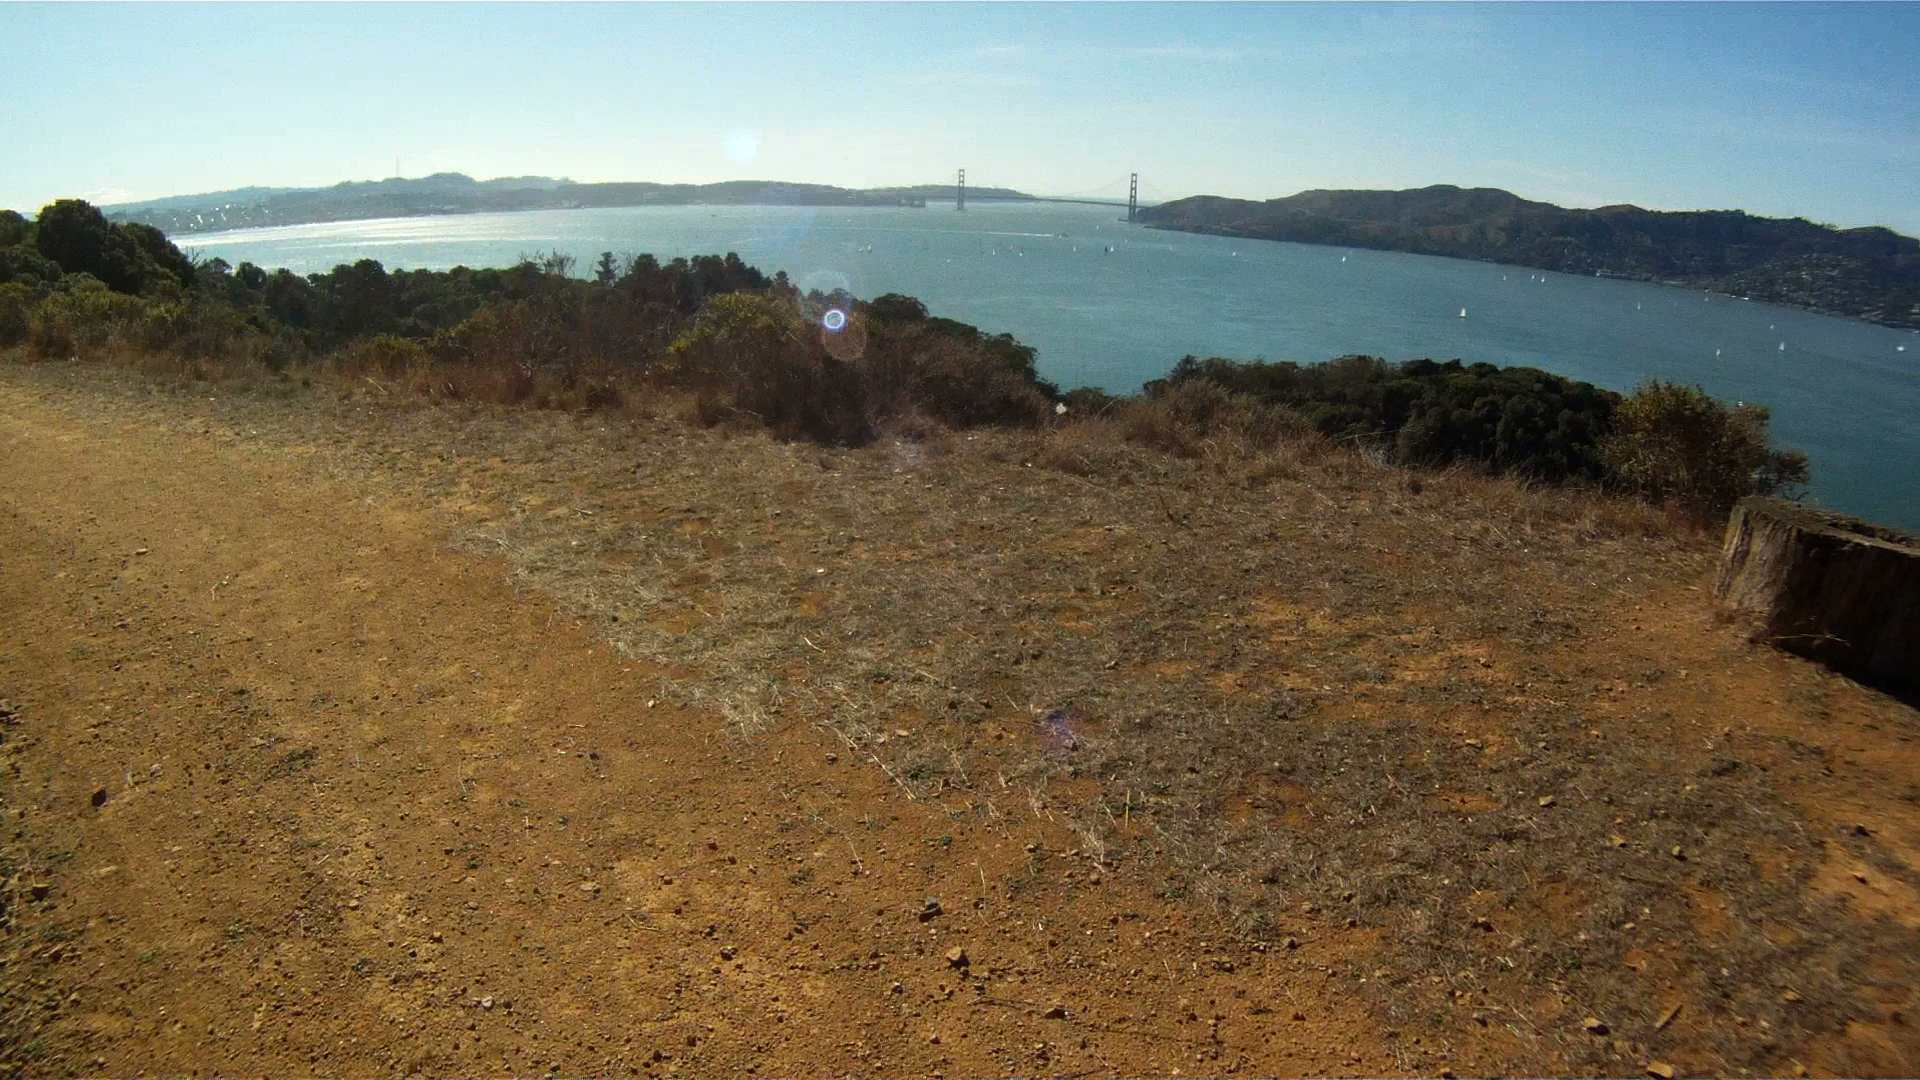
Everyone that comes to San Francisco knows the most famous island in San Francisco Bay, Alcatraz, but only a few know about the Jewel of the Bay, Angel Island.
Angel Island State Park, the largest island in the San Francisco Bay offers some of the best views of the surrounding Bay Area. It has been a cattle farm, a military barracks, a quarantine station, immigration station and now a nature conservatory.
This was our first endeavor in mountain biking and makes a great introduction for everyone.
Distance: 9.1 mile (one loop around the top and bottom trails)
Elevation Gain: 1017 feet (310 m)
Difficulty: Although you can ride your road bike along the lower paved path, the real fun comes when you hit the trails. This is a great beginner’s trail and gives you an amazing introduction to mountain biking without too much difficulty.
Getting to Angel Island
There are two ways to get to Angel Island. The easiest way to get there is to take the Blue & Gold Ferry from Pier 41. This ferry leaves at 9:45 am every day. You can buy tickets at the box office at Pier 41 or online.
The second way to get to Angel Island is to take the Angel Island Ferry from Tiburon. This ferry runs at a less regular schedule which varies throughout the year.
You can return to San Francisco either by taking the Blue & Gold Ferry directly back, or your can return to Tiburon, and return on a later ferry back from Tiburon.
When you arrive at Angel Island, you dock at Ayala Cove. This route is a set of loops, so you begin and end at Ayala Cove. This is the dock where you catch the ferry to both Tiburon and San Francisco.
From Ayala Cove, follow the trail to the Visitor’s Center. Bikes are not allowed on the pavement for a few hundred feet, so make a left onto the trial and follow it to the lower, paved route around the island.
Approximately a mile and a half down the path, you encounter the trail to Camp Reynolds. Camp Reynolds includes the brick barracks you see from Sausalito and the ferry.
This is an unpaved trail leads down to the Camp and the water’s edge if you turn right at the fork. At the Camp, you can experience a civil war cannon shot around 1 pm each day.
We prefer to continue along the path and turn left at the fork. This unpaved trail leads back to the main loop shortly ahead.
Back on the path, once you crest the hill you get amazing sweeping views of San Francisco from the Golden Gate Bridge to the Bay Bridge. Make sure to stop and take a few pictures, this is really one of the best spots on the island.
Continuing along the path, you can get your next round of trail riding on your way up to Battery Drew. To get there, take the left fork and head up the hill.
Keep climbing and you’ll get some more great views.
Your next taste of an off-raod downhill is next up. Its got some loose gravel, some dirt and an nice fast slope.
A short ride back along the the path and your entrance to the upper off-road trail is on the left.
The entrance is a steep path with loose rock, so get a head of steam and power your way to the top, where you’ll immediately turn right.
Follow the upper path as it rolls along with eastern shore of the island with many of the island’s buildings below.
About halfway along the eastern side, the path makes a sharp left up the hill, away from the picnic area.
Climb past the water housing area, and watch for deer here. Just past then fence the path takes another left.
Continue along the gently rolling path and enjoy the gorgeous scenery as you traverse the northern side with Tiburon across the channel.
As you approach the western side of the island, you’ll see Sausalito and the Golden Gate Bridge.
The path rolls downhill as it leads you back to the return to the lower main road.
You can ride the upper path again if you are up for it, or you can turn right and go back to complete the lower path.
When you are ready to head back to the lower path, turn right down the hill and continue straight at the intersection. You’ll get more sweeping views of San Francisco from the Bay Bridge to the Golden Gate Bridge.
A short way down the path is the best paved downhill of the day. It’s a quick descent with a curve to the left at the bottom where the road forks.
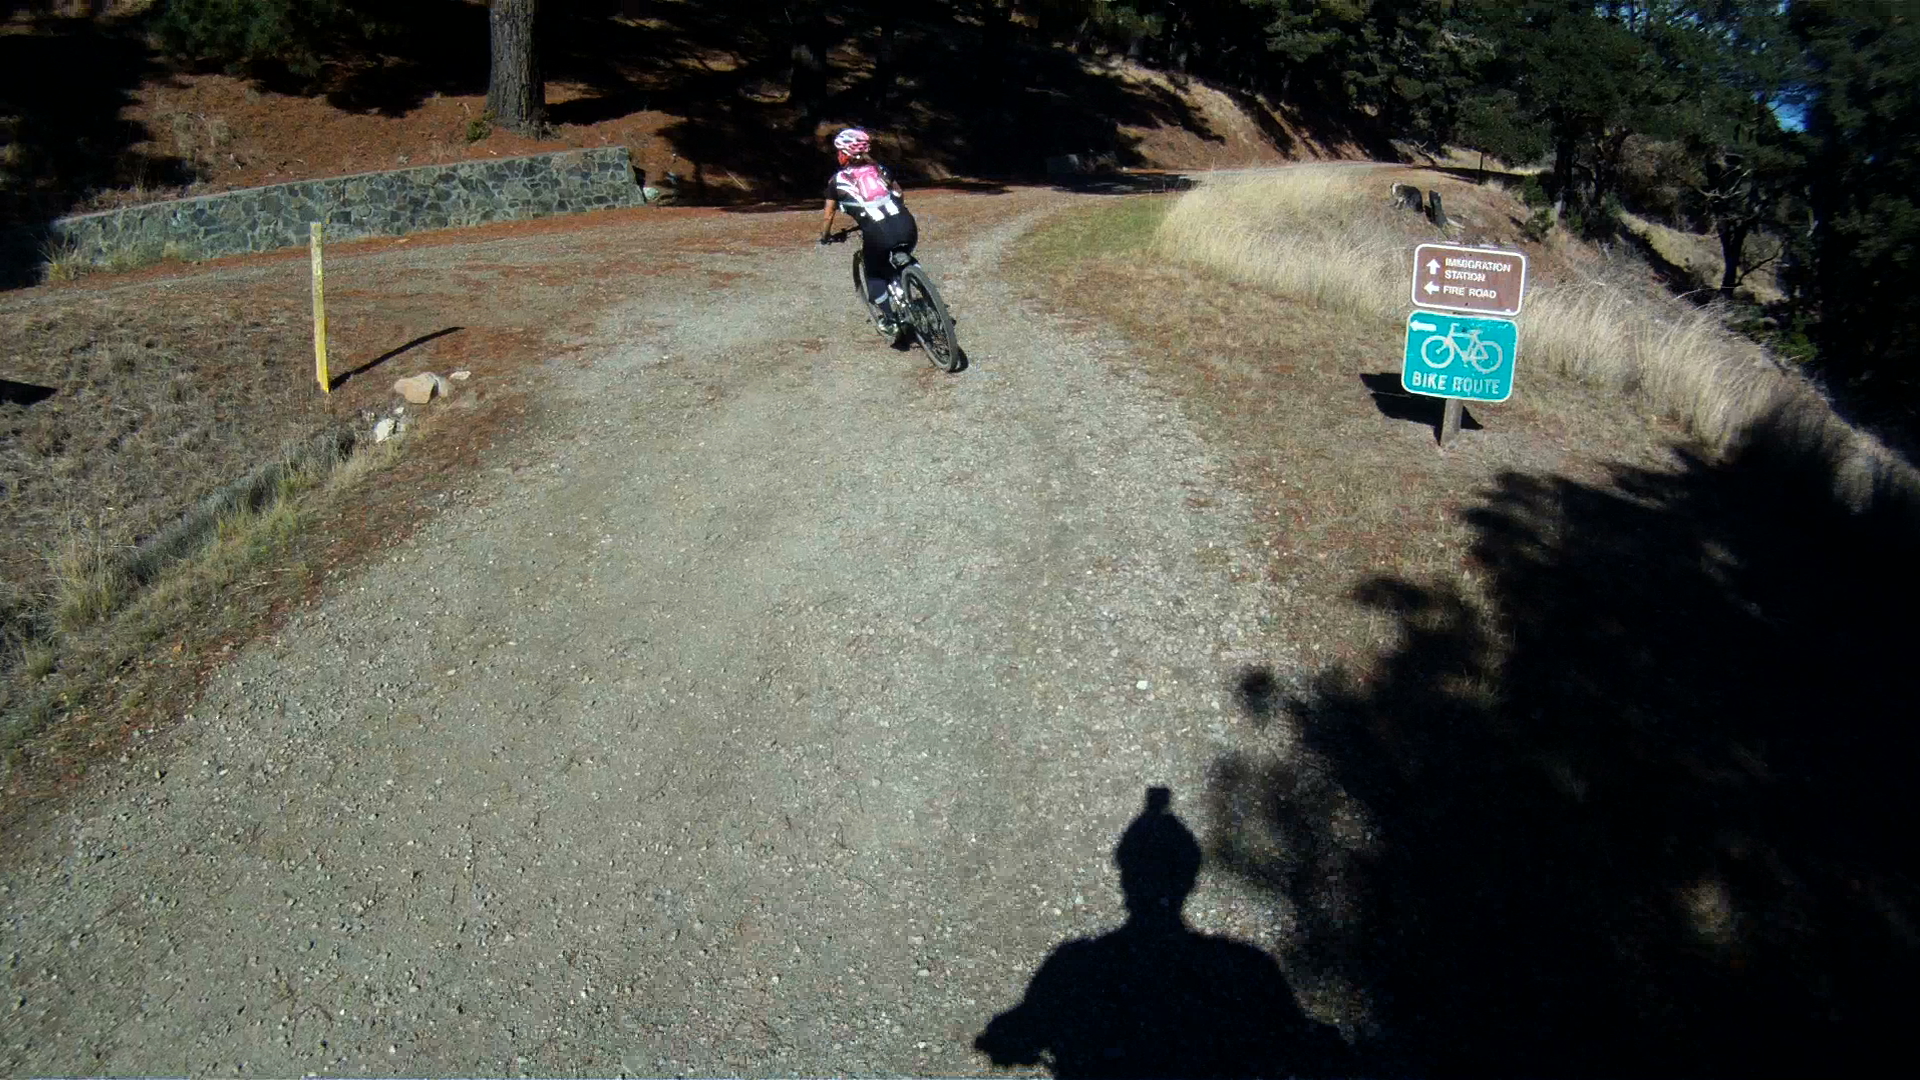
Quarry Point is down the road on the right. You’ll see housing barracks on the left of the main path and a dock lower down the hill to the right. This part of the island was a rock quarry from 1850 through 1922 and used to construction buildings from Alcatraz to Fort Point and even the California Bank building in the Financial District of San Francisco.
Further along the path you’ll pass by the Immigration Station. You can go for a stroll or take a tour of the Immigration Station. This immigration station was in use from 1910 thought 1940.
The rest of the route is another 1.5 miles of rolling path back to Ayala Cove. Watch for the entrance back to the bike route, it is a sharp right after a quick downhill.
If you miss the turn, no big, just continue on and turn around.
Follow the path and return back to the docks at Ayala Cove where you can pick up a ride back to Tiburon or San Francisco.
After a day of adventure on Angel Island, you really get a sense of how much fun mountain biking can be. While most of the route is pretty tame, there is some loose terrain and quick descents that give you a sense of trail riding.
While accessing this park is a bit more complicated than just hopping in your car, it is totally worth while. The views, the experience and the fun you will have both on the island and on the boat to the island are memories waiting to be made.
Bike maintenance doesn’t just happen when you take your bike to the shop, it’s what you do before and after every ride. To keep our bikes working their best all of the time, we have these pre- and post-ride rituals.
PRE-RIDE RITUAL
Because of our post-ride rituals, our pre-ride check takes only a few minutes. All that is required is to pump your tires to the desired pressure. We use 95 – 100 psi for normal rides, or 100 – 110 psi for races. Once the tires are pumped, we are ready to roll with the clean, bright and shiny frames!
POST-RIDE RITUAL
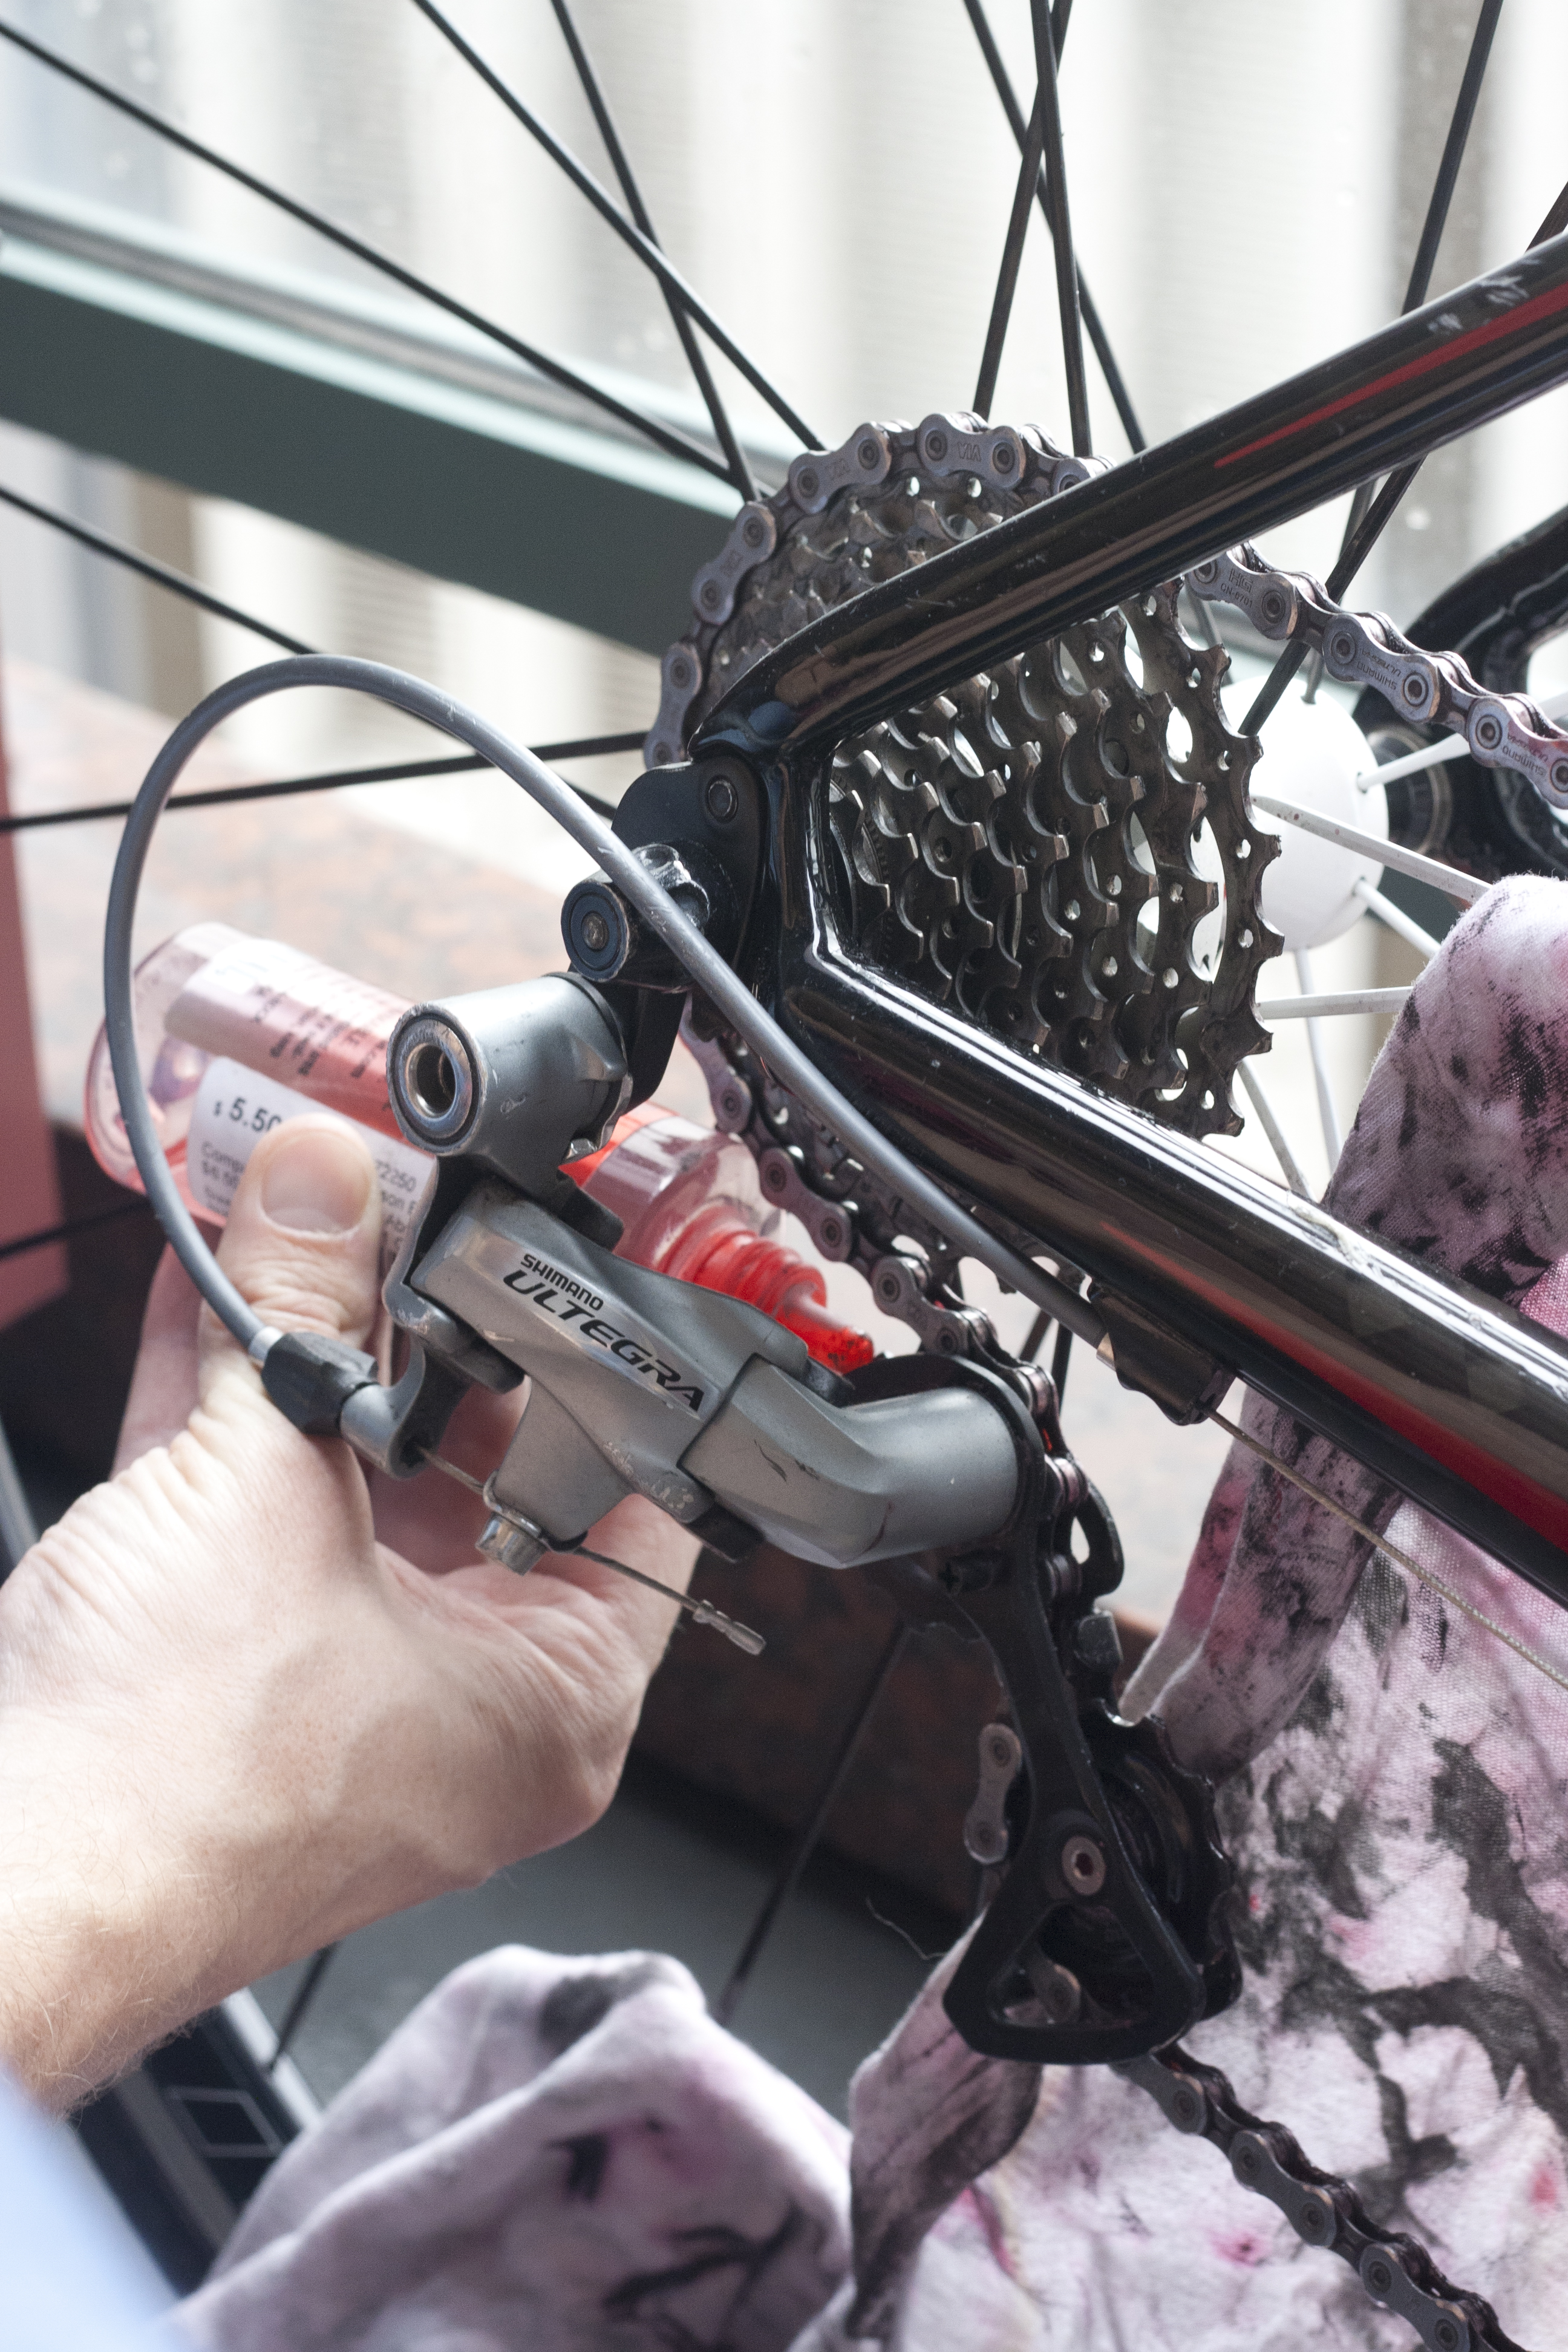
After a ride is when your bike needs the most care. Putting your bike away dirty is one of the ways to make your bike and components wear out more quickly. To keep your bike working better longer, our post-ride ritual requires lube, a couple of rags, a paper bag, steel wool and alcohol pads.
Start by lubing the chain with Rock-n-Roll lube. On days with dry roads, we use the red, Absolute Dry lube. When the roads are wet, or it’s foggy out, we use the Gold lube for a bit more waxiness to keep the chain from getting wet. There’s a third option which is great for your mountain bike, the blue Rock-n-Roll Extreme lube.
Set up the rags behind the the chain and apply the lube to the lower part of the chain behind the chain ring. Rotate the pedals ten times while applying the lube. Next apply the lube to both upper and lower rear derailleur sprockets. Then rotate the pedals another ten times.
With a clean rag, wipe the excess lube off the chain and derailleur sprockets. Start with the lower sprocket and then the upper sprocket. Then the chain where it meets the lower sprocket and repeat where the chain meets the upper sprocket.
Then wipe the excess lube off the top and bottom of the chain by gripping the top and bottom of the lower part of the chain with your thumb and forefingers and rotating the pedals twenty times. Then do the same for the sides of the chain an rotate the pedals thirty times. Finally, repeat wiping the top and bottom of the chain another ten rotations. When you are done, your clean rag will have much of the dirt, grime and excess lube from your chain.
After lubing the chain, we use an isopropyl alcohol pad to wipe off the aluminum breaking surfaces of the rims in order to remove any brake dust and ensure proper brake power.
If you have a nick or other surface imperfection in your braking surface, you can also use steel wool to smooth out the surface. We use copper, as it leaves less residue on the aluminum braking surfaces as your are smoothing it out.


")