& Beyond: The Descent of Haleakala – Maui, Hawaii


Your view of the world from the top of Haleakala, Maui, Hawaii

Hawaii is known for its visitors, vegetation, and vistas. One of the best views is from the top of Maui’s tallest volcano, Haleakala. From here you can see the ocean, the caldera, and other Hawaiian islands. At an elevation of 10,000 feet above sea level, the peak of the mountain it even gets snow in the winter. Tourists flock here every morning to see the sunrise at the top of the top of the “House of the Sun”. We had heard rumors of this descent before we came to Maui, so we decided to check it out for ourselves. What we found was an incredible descent, the likes and length of which could be found nowhere else in the world. So what’s a biking couple to do when there’s 38 miles of paved switchbacks? We rented road bikes and hopped a ride to the top! What we found can only truly be appreciated in person, but by video is the next best thing! Enjoy!

The Route & Stats

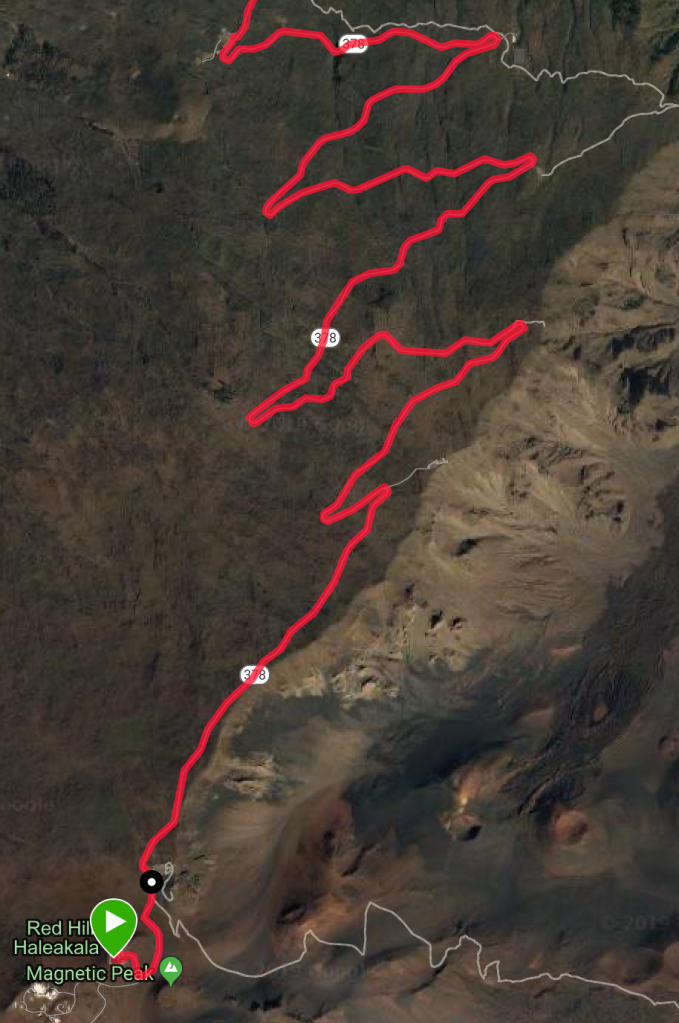
Overview of the route from the summit to Baldwin Beach

Distance from Summit to Baldwin Beach (near Paia): 38.70 miles

Elevation Loss: 10,000 feet (3,048 m)

Difficulty: Not for the feint of heart. Being a good descender and knowing your limits are essential to this ride. While there are commercial tours (with motocross helmets and comfort bikes) offered starting from the lower slopes (~26 miles of descending), the technical nature, high winds, and vast number of tourists at the upper section lends itself to a myriad of potential dangers. Plan ahead, check the weather, and be careful as you never know what this mountain will throw at you.

Haleakala National Park – The Upper Slopes

Most of the volcano and the upper portion of the descent is part of Halealaka National Park. The park is home to an observatory and offers self-guided hiking tours. Commercial bike tours have not been allowed to start from the summit since the late 2000’s, so you will need a second rental car, or a friend to drop you off at the top if you don’t want to cycle up the mountain. If you are interested in climbing to the top, check out the Cycle to the Sun race.

The cycling route here is very simple, follow the road! This first portion of the ride takes you along technical switchbacks for 10 miles to the National Park’s visitor’s center and is the focus of Part 1 of the Descent of Haleakala.

The first 10 miles from the summit parking lot to the Visitor’s Center

The upper slopes of Haleakala mountain in Hawaii provide some of the most breathtaking vistas on Maui. This part of the 38-mile descent to Baldwin Beach, near Paia takes you through the upper switchbacks to the National Park’s visitor’s center where Part 2 will pick up.

The Lower Slopes

The lower slopes of Maui’s Haleakala volcano take you through the cloud forest, above the cane fields, and finally end with a trip to the beach. This part of the 38-mile descent to Baldwin Beach, while less technical, is no less stunning than the upper portion of the ride.

Once you exit the national park, continue to follow the road until it dead ends into Route 377, Kekaulike Avenue, where you make a right (we froze the video on the sign).

Continue following Route 377 until it also dead ends at Route 37, the Haleakala Highway, where you once again make a right.

Finally, follow the Haleakala Highway the next several miles as you pass the cane fields all the way to the outskirts of Kahului, near the airport. At Route 36, make a right (again) and follow the road all the way to Baldwin Beach, a convenient place to park your second car or meet your ride to the top.

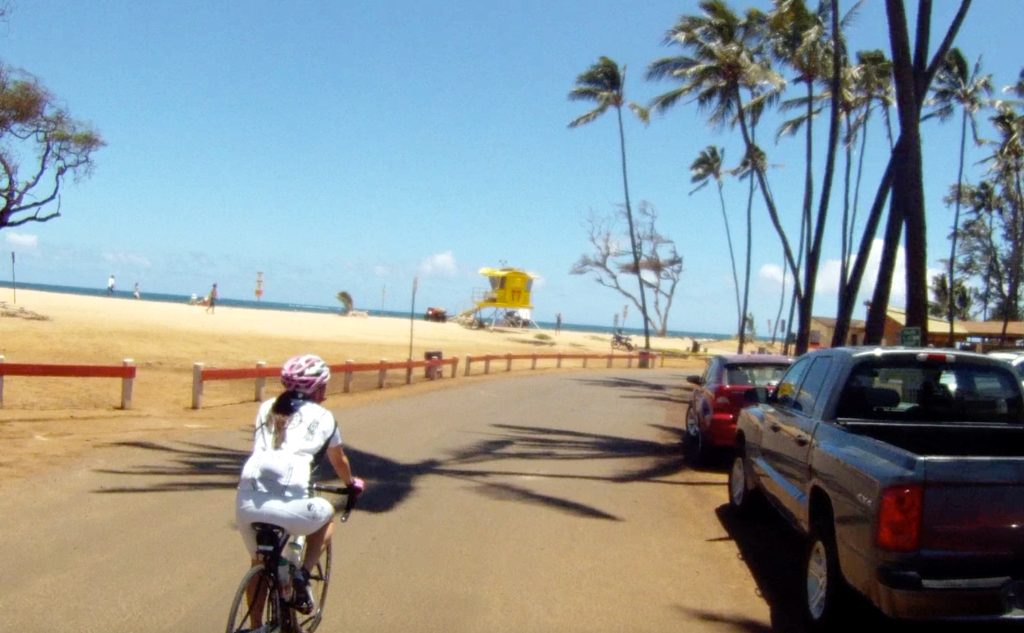
Once you arrive at Baldwin Beach, your ride is complete and its time to relax and find some lunch in Paia, which is just a short walk or ride just up the road.

Here’s an overview of the route from Relive!

Tips & Tricks: Disc Brakes Pad Replacement


disc-brake

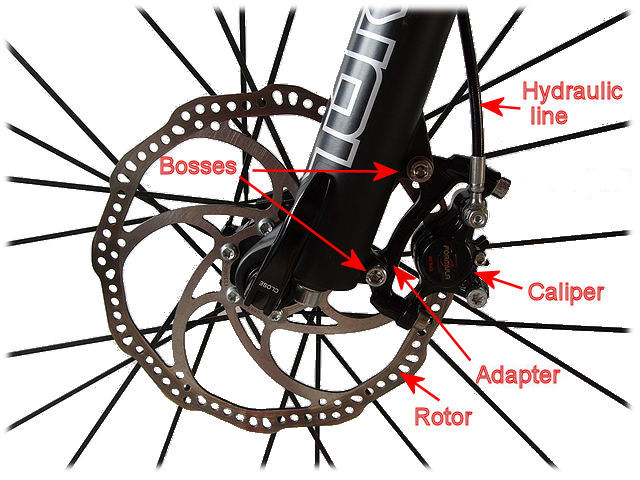
Hydraulic disc brake. Photo: Wikimedia Commons

As cycling changes, so does cycling technology.  The biggest change to road cycling in the last ten years is the use of disc brakes on road bikes. While road disc brakes are still making inroads into the professional peloton, they are present on most new road bikes at every level.  Cyclocross bikes have been using cable-driven disc brakes, most road bikes now use hydraulic disc brakes that have greater power, but require more maintenance in general.  Many experienced road cyclists understand use and maintenance of rim brakes and even replace their own. Although disc brakes are substantially more complicated in nature, replacement of brake pads is only slightly harder.  In this article we will cover the types of disc brake pads available along with a step-by-step guide to replacing your own disc brake pads.

Disc Brake Pad Selection

While most mechanics will tell you to replace worn brake pads with like-kind, there are several aftermarket manufacturers which make replacement pads to fit any caliper type an size.   We have used aftermarket replacement pads from both SwissStop and Kool Stop to replace the pads in our disc brake equipped mountain bikes and disc brake equipped road bikes.  As we have personal experience with these pads, we will discuss the selections from these manufacturers in our discussion of brake pad selection.

Disc brake pads consist of a braking compound bound to a metal backing plate.  There are two main types of disc brake pad compound materials : (1) sintered (metallic); and (2) organic (semi-metallic).  Knowing the difference between the pad compound types and the qualities of each can make your pad selection easier based on your riding style and environmental conditions.

Sintered Pads

Sintered pad are made of a metallic braking compound bound to a metal backing plate.  Some of the metal backing plates are aluminum, others are brass for increased heat conductivity.  Sintered pads are the standard material that comes stock with both SRAM and Shimano systems.  Sintered pads are better in wet weather than their organic counterparts.  They also have a long life and the braking power does not reduce when the pads are hot (high heat resistance).  However, sintered pads are very noisy and take a long time to bed in properly.   The metal to metal contact between the pad material and the rotor creates a very reliable braking surface in all weather conditions, but in our experience the noise from the metal to metal contact became very annoying and we changed out otherwise serviceable sintered pads for organic pads.

Organic Pads

Organic pads are made of proprietary mix of organic materials that are blended and bound together using a resin and then bound to the metal backing.  There are trace elements of metals in the organic pads as well, but much less than in the sintered, hence the name “semi-metalic” pads.  The SwissStop organic pads consist of a mix of Kevlar, Ceramic and Brass materials.  Organic pads provide excellent braking power along with better power modulation through the pull of the braking lever than sintered pads. Organic pads have consistent performance in both wet and dry conditions while maintaining excellent pad life.  Once broken in, the noise in dry conditions is minimal except when the rotors and pads are very hot.  There is some noise in wet conditions, but not as much as with sintered pads.

Other Mixes and Variants 

In addition to the standard sintered and organic pads, aftermarket pad manufacturers have been attempting to improve on both sintered and organic compounds by making variants of each and revised backing plates that maximize braking power and consistency, increase pad life and reduce braking noise in all environments.

Brake pads with cooling fins are the one variant of the disc brake pad that attempts to reduce the temperature of the brake pad material and rotor by maximize the surface area of the backing plate.  This is accomplished by adding a cooling fin heat sink (like on a computer chipset) to the backing plate.  The cooling fin acts as an air-cooled radiator that dissipates heat from the brake pad material without transferring it to the rotor.  Reducing the temperature of the rotor and pad material increases the braking power and modulation along with extending the life of the pad and rotor.  One example of a brake pad with a heat sink is the Kool Stop Aero Kool pad.

KS-D635TK

Kool Stop Aero Kool Pad with copper backing plate and add-on cooling fin

Another example of a brake pad with a cooling fin is the SwissStop EXOTherm2 pad. We are presently running the SwissStop EXOTherm2 pad on our road bikes and have had good success with keeping the brakes cool.  However, they are a bit loud when stopping in either wet, or humid environments.

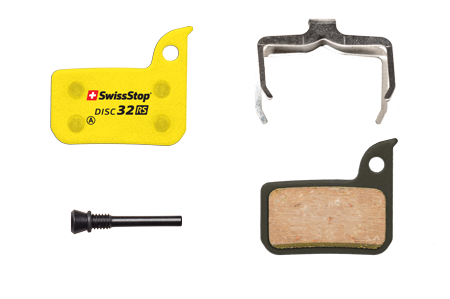
SwissStop has also made a variant of its organic pad compound with its Disc RS compound.  The Disc RS compound remains organic, but seeks a balanced combination of brake performance, durability and incredibly low noise in all conditions.  This is accomplished with a revision to their organic compound mix along with a reduction in the backing plate thickness that provides the preferred thermal characteristics, strength and stability of steel while reducing weight and increasing pad thickness.  The Disc RS was debuted in August 2017, but we have not had the opportunity to test out these pads yet.
disc32rs

SwissStop Disc RS

Brake Pad Replacement Process

Once you’ve selected the brake pads that are right for your style of riding, then its time to install them.  The process of replacing the brake pads is relatively simple, though a bit more complicated than for rim brakes.  Follow these simple steps and the pad replacement process will go quickly.  One thing to keep in mind is that hydraulic disc brakes require the lines to be bled at certain points in the life of the system, however, manufacturers (SRAM v Shimano v Campy) vary on how often you should bleed the hydraulic brake lines.  This is a very involved process that should be performed by your mechanic at the proper maintenance point.  Refer to your disc brake manufacturer’s instructions for the specific time frames.

WARNING: During the brake pad replacement process, DO NOT squeeze the brake lever unless you are using a pad spreader tool or until the wheel is back on the bicycle.  

Step 1

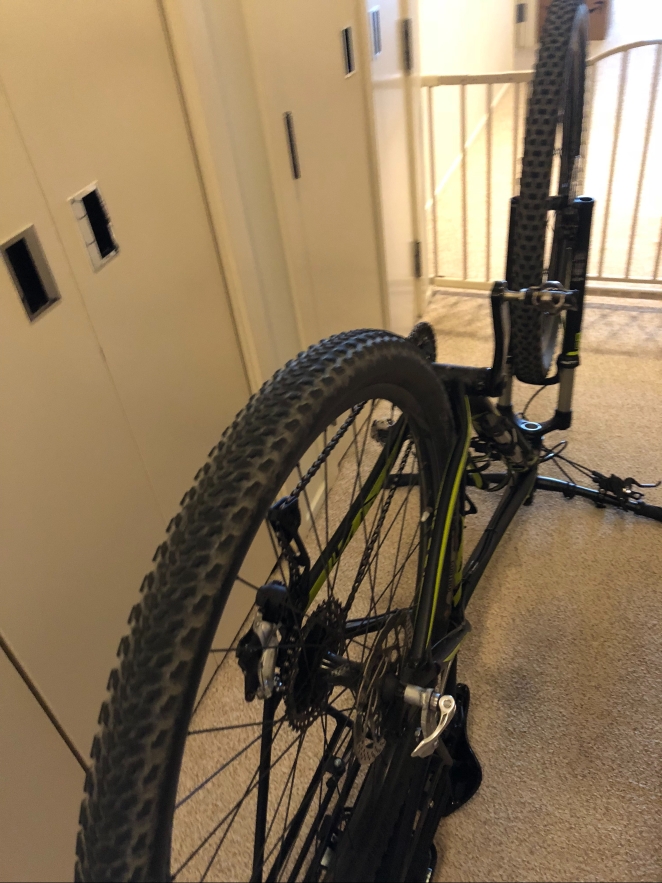
Either attach your bike to a stand or flip it upside down and remove the first wheel.  When removing the rear wheel, its best to shift the chain to the further outboard gears (largest chainring in the front and smallest cog on the cassette in the back).  This allows for quick chain alignment when putting the wheel back in place.
0OyOAnW6QXyQH6Kbv0Jo%A

Step 2

Remove the locking mechanism for the pads.  This can either be in the form of a cotter pin or a locking clip and pad retention bolt.

Step 3

Remove the pads and spring (the metal part holding the pads in the caliper).  The pads are removed toward the disc.

Step 4

Reset the caliper pistons to be in the fully retracted positions (flush with the caliper surface).  This can be done with a plastic tire lever to avoid damaging the pistons.

Step 5

Install the new pads and spring followed by the cotter pin or pad retention bolt and locking clip.

Step 6

If you have a pad spreader tool, insert it between the pads and depress the brake lever to ensure the free movement of both pistons.  If you don’t have a pad spreader tool, skip this step.

Step 7

Reinstall the wheel.  If you skipped Step 6, depress the brake lever once the rotor is reinstalled and check for the free movement of the pistons.  Rotate the wheel to ensure that neither pad is rubbing.  If the pads are rubbing, continue to rotate the wheel and determine if the rotor needs adjustment or if the caliper adjustment needs modification. Once the pads are replaced, it’s time to go for a ride and bed in the new pads.

Brake Pad Bed In Process

One of the idiosyncrasies of  disc brakes, as opposed to rim brakes, is the necessity to “bed in” the pads.  Bedding in is the process of working the pad compound onto the rotor in order to maximize the braking power.  Brake pad performance and noise can be affected by the bedding in process.  Once a pad has been properly bed in it becomes more effective and less noisy in most conditions.  The various types of pad compounds can be bedded in by using the following procedure recommended by SwissStop:

Step 1. On a gradual downhill slope, drag each brake for 20-30 seconds, alternating between front and rear. Repeat 2-3 times.

Step 2. On a steeper slope, engage and drag the brakes for 10-15 seconds then increase lever pressure until the bike slows almost to a complete stop. Repeat 2-3 times.

Pro Tip: The front pads will have been heated more than the rear. To achieve optimal performance, exchange the front and rear pads then repeat Step 2.

CAUTION before replacing or exchanging brake pads it is essential to let all parts cool.

After we installed new SwissStop organic pads on our hydraulic disc brake equipped road bikes, we followed this process for bedding in the pads.  While the process took a couple of rides to complete due to the swapping of the pads, the stopping power was there quickly and the brakes are typically quiet other than when the rotors are hot.

More Information on Disc Brakes

For more information on disc brakes, see Bicycling Magazine’s The Beginner’s Guide to Disc Brakes.

Promoting Bike Culture in the US


By Featured Writer Jenny Holt

market-cropped

Bike culture has seen a dramatic change in the last decade.  According to the 2014 Statista Report, there are more than 67 million riders in America, an increase of 20 million riders  since 2008. Where car sales have stabilized or even decreased, bicycle purchases have more than doubled. As more people see the health, economic and other effects of cycling, more trips that used to be made by care are being replaced by leg power.  Cities like Portland, San Francisco, Minneapolis and Washington, D.C. are seeing more and more bike commuters each year.  However, even with the ever increasing number of cyclists on the road, there are still many challenges facing bike riders in the US.

Challenges of Riding a Bicycle

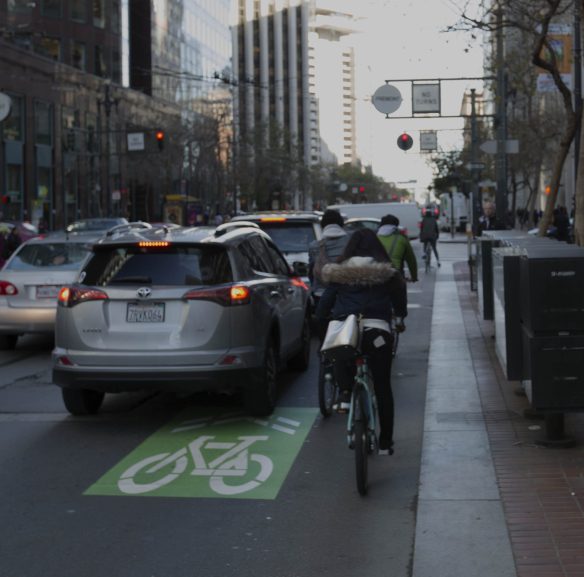
In cities like Amsterdam and Copenhagen where biking is the norm, in the US, a majority of people, especially drivers, still see cycling in a different light.  This difference in perception has created invisible barriers to increasing overall cycling activity. The results of a study commissioned by PeopleForBikes.org in 2014 revealed several of these barriers. One is the lack of bike infrastructure (i.e., protected bike lanes and separate paths).  This was found to dissuade a third of respondents from cycling more often. Other problems include lack of access to bicycles especially among lower-income households.  The study found that the major issue why Americans cycle less often is safety.  In the study, 54% of respondents admitting that they are afraid to be hit by vehicles while cycling.  This is a significant concern for cyclists in areas without protected bikes or wide shoulders for cycling.  The study found that 46% of its participants would be more inclined to ride a bike in protected bike lanes, ones that are physically separated from vehicular traffic, as opposed to being forced to ride in the same lane as traffic.

intersection-cropped

Solutions to Increase Bicycle Participation

If a city has the goal of encourage a greater amount of cycling, politicians would be well-served to review the concerns of those who, but for the safety concerns, would cycle more often and replace a greater number of car trips with bicycle trips.  Overall, the survey results indicated that respondents want to see more protected bike lanes because it found safety was a major concern of the participants.  The first thing that is needed in greater quantity is biking infrastructure. Another major issue is bike theft.  To help combat bike theft, the construction of secure parking for bicycles is also important.

Cities in the US that have high cycling rates, such as Chicago, San Francisco and Portland, all have good support and investments from city governments.  In San Francisco, the SF MTA has constructed bike lockers and have installed bike stands throughout the city.

bike-parking-street

Other systems, like BART (Bay Area Rapid Transit) has bike parking which offers protection from the rain and a safe area where bicycles can be left without fear of being stripped at the end of the day.  These are two systems in San Francisco that are helping make commuting by bike safer and more worry free.

bike-parking-bart-cropped

There are also bike lanes and pathways, parking and well-connected bike roads are a few examples of initiatives by governments to promote use of the bicycle. The San zFrancisco Bike Coalition has helped map out many of the routes used by cyclists, some of which are now being made into protected bike lanes.  Others like the Marin County Bike Coalition have helped with the transformation of “rails-to-trails” throughout the county as well as advocacy for improvement of the road surfaces.

protected-lane-blur

Bike education programs were also rolled out which included safety tips such as fitting bicycles with proper lights like LEDs to enhance day or night time visibility, wearing of crash helmets, high-visibility clothing gear and the like.  In addition, there were bike-sharing and cost-sharing programs that largely, encouraged more people to ride bicycles than drive motor vehicles whether it is for recreation or as a means of transportation.
As the number of cyclists in the US grows, the number of cyclists and car encounter also grows.  The key to keeping people on their bikes is education and keeping everyone (both cyclist and driver alike) as safe as possible while they are on the road.  Happy riding and keep the rubber side down.

bike-lane-embarcadero-cropped

MTB Trail: Miwok Trail – Tennessee Valley to the Marin Headlands


GOPR0267-19

If you are up for a challenge, the Miwok Trail adds a degree of difficulty to your ride with its technical climb out of the Tennessee Valley back towards the Marin Headlands.  With its horse trail stairs and deep ruts, this is no trail for beginners.  Conquering this trail gives you appreciation for your front shock and builds your climbing prowess.

Screen Shot 2015-08-08 at 1.41.34 AM

Screen Shot 2015-08-08 at 1.41.46 AM

Distance: 5.75 miles  (9.3 km)

Elevation Gain: 1068 feet (325 meters)

Difficulty: This trail has a technical assent with stairs and a fast descent back toward the Marin Headlands.  This is definitely an intermediate ride.

GOPR0267

Starting at the Tennessee Valley parking lot, walk your bike through the Miwok Stables until you see the trail on the right next to the manure pit.

GOPR0267-2 GOPR0267-3

This is the beginning of the Old Springs Trail.

The Old Springs Trial has a series of stairs and bends as you climb the 1.3 miles to the Miwok Trail.

GOPR0267-9 GOPR0267-11

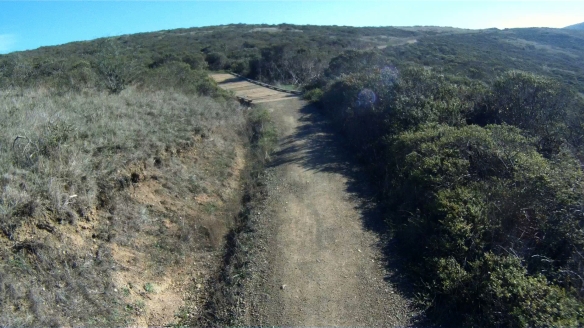
This trail can get technical in spots where the dirt gets larger rocks and the pitch increases.

GOPR0267-14 GOPR0267-17

Continue to follow the Miwok Trail as it continues to roll over the wooden bridges before turing onto the Miwok Trail.

GOPR0267-21

At the top of Old Springs Trail, make a right onto the Miwok Trial and start the descent.

GOPR0267-22

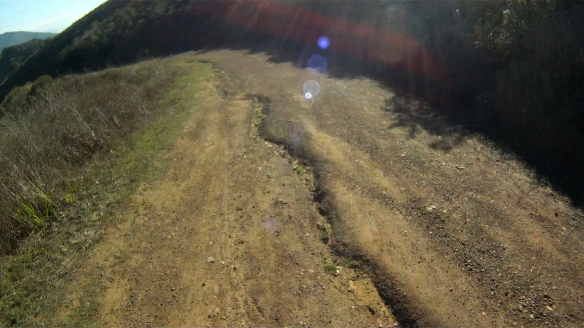
The descent is fast, so check your brakes and stay in control.  Watch out for the deep ruts and hikers on the descent as well.

GOPR0267-23 GOPR0267-24 GOPR0267-28

As the descent flattens out, watch for a turn to the left to return to the Bobcat trail and the Marin Headlands.  The left turn is 2.75 miles from the start.  If you make the left, watch for a quick right just after a set of stairs.  Follow this trail for a few hundred feet to the bridge and make a right, then a left on the other side of the bridge to return to Bunker Road.

GOPR0267-31

Or…

If you miss the turn (like I did on this particular run), continue straight on the Miwok Trail and you will end up in a parking lot along Bunker Road.

GOPR0267-33 GOPR0267-34

Make a left on Bunker Road and follow it to the entrance to the Coastal Trail on your right, the same trail you came down on our Bobcat Trail route.

GOPR0267-36 GOPR0267-37

Follow the Coastal Trail as it climbs its way back to the roundabout in the Marin Headlands.

GOPR0267-41

GOPR0268

Go through the gate and start up the trail.

GOPR0268-1

As you experienced on the way down, this trail narrows in places and has loose rock in others.

GOPR0268-6

Continue winding your way back up the trail and through the narrow single-track.

GOPR0268-11 GOPR0268-12

At the top of the climb, you’ll be back at the parking lot next to the roundabout and will be able to see the familiar red paint on the North Tower of the Golden Gate Bridge.

GOPR0268-13 GOPR0268-16

While challenging, the Miwok Trail is rewarding not only for the views, but also the sense of accomplishment once you realized what your mountain bike and you can do!  Enjoy and stay safe.